| SQL*Plus® User's Guide and Reference Release 10.1 Part Number B12170-01 |
|


|
View PDF |
| SQL*Plus® User's Guide and Reference Release 10.1 Part Number B12170-01 |
|
|
View PDF |
This chapter contains descriptions of the SQL*Plus commands available in command-line and iSQL*Plus interfaces listed alphabetically. Each description contains the following parts:
| Section | Description |
|---|---|
| Syntax | Shows how to enter the command and provides a brief description of the basic uses of the command.
See "Conventions" for an explanation of the syntax notation |
| Terms | Describes the function of each term or clause appearing in the syntax. |
| Usage | Provides additional information on uses of the command and on how the command works. |
| Examples | Gives one or more examples of the command. |
You can continue a long SQL*Plus command by typing a hyphen at the end of the line and pressing Return. If you wish, you can type a space before typing the hyphen. SQL*Plus displays a right angle-bracket (>) as a prompt for each additional line.
You do not need to end a SQL*Plus command with a semicolon. When you finish entering the command, you can press Return. If you wish, however, you can enter a semicolon at the end of a SQL*Plus command.
Syntax
@{url | file_name[.ext] } [arg...]
Runs the SQL*Plus statements in the specified script. The script can be called from the local file system or from a web server. Only the url form is supported in iSQL*Plus. The @ command functions similarly to START.
Usage
All previous settings like COLUMN command settings stay in effect when the script starts. If the script changes any setting, this new value stays in effect after the script has finished.
You can include in a script any command you would normally enter interactively (typically, SQL, SQL*Plus commands, or PL/SQL blocks).
If the START command is disabled (see "Disabling SQL*Plus, SQL, and PL/SQL Commands"), this will also disable the @ command. See START for information on the START command.
SQL*Plus removes the SQLTERMINATOR (a semicolon by default) before the @ command is issued. If you require a semicolon in your command, add a second SQLTERMINATOR. See SET SQLT[ERMINATOR] {; | c | ON | OFF} for more information.
Examples
To run a script named PRINTRPT with the extension SQL, enter
@PRINTRPT
To run a script named WKRPT with the extension QRY, enter
@WKRPT.QRY
You can run a script named YEAREND specified by a URL, and pass values to variables referenced in YEAREND in the usual way:
@HTTP://machine_name.domain:port/YEAREND.SQL VAL1 VAL2
@FTP://machine_name.domain:port/YEAREND.SQL  VAL1 VAL2
On a web server configured to serve SQL reports, you could request SQL*Plus to execute a dynamic script with:
@HTTP://machine_name.domain:port/SCRIPTSERVER?ENDOFYEAR VAL1 VAL2
Syntax
@@url | file_name[.ext]
Runs a script. This command is almost identical to the @ ("at" sign) command. When running nested scripts it looks for nested scripts in the same path or url as the calling script. Only the url form is supported in iSQL*Plus. The @@ command functions similarly to START.
Terms
url
Specifies the Uniform Resource Locator of a script to run on the specified web server. SQL*Plus supports HTTP and FTP protocols, but not HTTPS. HTTP authentication in the form http://username:password@machine_name.domain... is not supported in this release.
file_name[.ext]
Represents the nested script you wish to run. If you omit ext, SQL*Plus assumes the default command-file extension (normally SQL). For information on changing the default extension, see SET SUF[FIX] {SQL | text}.
When you enter @@file_name.ext from within a script, SQL*Plus runs file_name.ext from the same directory as the script.
When you enter @@file_name.ext interactively, SQL*Plus runs file_name.ext from the current working directory or from the same url as the script from which it was called. If SQL*Plus does not find the file, it searches a system-dependent path to find the file. Some operating systems may not support the path search. See the platform-specific Oracle documentation provided for your operating system for specific information related to your operating system environment.
Usage
All previous settings like COLUMN command settings stay in effect when the script starts. If the script changes any setting, the new value stays in effect after the script has finished.
You can include in a script any command you would normally enter interactively (typically, SQL or SQL*Plus commands).
If the START command is disabled (see "Disabling SQL*Plus, SQL, and PL/SQL Commands"), this will also disable the @@ command. For more information, see the SPOOL command.
SQL*Plus removes the SQLTERMINATOR (a semicolon by default) before the @@ command is issued. A workaround for this is to add another SQLTERMINATOR. See SET SQLT[ERMINATOR] {; | c | ON | OFF} for more information.
Examples
Suppose that you have the following script named PRINTRPT:
SELECT DEPARTMENT_ID, CITY FROM EMP_DETAILS_VIEW WHERE SALARY>12000;@EMPRPT.SQL@@ WKRPT.SQL
When you START PRINTRPT and it reaches the @ command, it looks for the script named EMPRPT in the current working directory and runs it. When PRINTRPT reaches the @@ command, it looks for the script named WKRPT in the same path as PRINTRPT and runs it.
Suppose that the same script PRINTRPT was located on a web server and you ran it with START HTTP://machine_name.domain:port/PRINTRPT. When it reaches the @ command, it looks for the script named EMPRPT in the current working directory and runs it. When PRINTRPT reaches the @@ command, it looks for the script named WKRPT in the same url as PRINTRPT, HTTP://machine_name.domain:port/WKRPT.SQL and runs it.
Syntax
/(slash)
Executes the most recently executed SQL command or PL/SQL block which is stored in the SQL buffer.
The buffer has no command history list and does not record SQL*Plus commands.
Usage
You can enter a slash (/) at the command prompt or at a line number prompt of a multi-line command, or in the input area of the iSQL*Plus Workspace.
The slash command functions similarly to RUN, but does not list the command.
Executing a SQL command or PL/SQL block using the slash command will not cause the current line number in the SQL buffer to change unless the command in the buffer contains an error. In that case, SQL*Plus changes the current line number to the number of the line containing the error.
Examples
Type the following SQL script:
SELECT CITY, COUNTRY_NAMEFROM EMP_DETAILS_VIEWWHERE SALARY=12000;
Enter a slash (/) to re-execute the command in the buffer:
/
CITY COUNTRY_NAME ------------------------------ ---------------------------------------- Seattle United States of America Oxford United Kingdom Seattle United States of America |
Syntax
ACC[EPT] variable [NUM[BER] | CHAR | DATE | BINARY_FLOAT | BINARY_DOUBLE] [FOR[MAT] format] [DEF[AULT] default] [PROMPT text|NOPR[OMPT]] [HIDE]
Reads a line of input and stores it in a given substitution variable.
In iSQL*Plus, displays the Input Required screen for you to enter a value for the substitution variable.
Terms
variable
Represents the name of the variable in which you wish to store a value. If variable does not exist, SQL*Plus creates it.
NUM[BER]
Makes the variable a NUMBER datatype. If the reply does not match the datatype, ACCEPT gives an error message and prompts again.
CHAR
Makes the variable a CHAR datatype. The maximum CHAR length is 240 bytes. If a multi-byte character set is used, one CHAR may be more than one byte in size.
DATE
Makes reply a valid DATE format. If the reply is not a valid DATE format, ACCEPT gives an error message and prompts again. The datatype is CHAR.
BINARY_FLOAT
Makes the variable a BINARY_FLOAT datatype.
BINARY_DOUBLE
Makes the variable a BINARY_DOUBLE datatype.
FOR[MAT]
Specifies the input format for the reply. If the reply does not match the specified format, ACCEPT gives an error message and prompts again. If an attempt is made to enter more characters than are specified by the char format, an error message is given and the value must be reentered. If an attempt is made to enter a greater number precision than is specified by the number format, an error message is given and the value must be reentered. The format element must be a text constant such as A10 or 9.999. See COLUMN FORMAT for a complete list of format elements.
Oracle Database date formats such as "dd/mm/yy" are valid when the datatype is DATE. DATE without a specified format defaults to the NLS_DATE_FORMAT of the current session. See the Oracle Database Administrator's Guide and the Oracle Database SQL Reference for information on Oracle Database date formats.
DEF[AULT]
Sets the default value if a reply is not given. The reply must be in the specified format if defined.
PROMPT text
Displays text on-screen before accepting the value of variable from the user.
NOPR[OMPT]
Skips a line and waits for input without displaying a prompt.
ACCEPT NOPR[OMPT] is not applicable in iSQL*Plus.
HIDE
Suppresses the display as you type the reply.
To display or reference variables, use the DEFINE command. See the DEFINE command for more information.
Examples
To display the prompt "Password: ", place the reply in a CHAR variable named PSWD, and suppress the display, enter
ACCEPT pswd CHAR PROMPT 'Password: ' HIDE
To display the prompt "Enter weekly salary: " and place the reply in a NUMBER variable named SALARY with a default of 000.0, enter
ACCEPT salary NUMBER FORMAT '999.99' DEFAULT '000.0' -
PROMPT 'Enter weekly salary:  '
To display the prompt "Enter date hired: " and place the reply in a DATE variable, HIRED, with the format "dd/mm/yyyy" and a default of "01/01/2003", enter
ACCEPT hired DATE FORMAT 'dd/mm/yyyy' DEFAULT '01/01/2003'-
PROMPT 'Enter date hired:  '
To display the prompt "Enter employee lastname: " and place the reply in a CHAR variable named LASTNAME, enter
ACCEPT lastname CHAR FORMAT 'A20' -
PROMPT 'Enter employee lastname:  '
APPEND is not available in iSQL*Plus.
Syntax
A[PPEND] text
where text represents the text to append.
Adds specified text to the end of the current line in the SQL buffer. The buffer has no command history list and does not record SQL*Plus commands.
To separate text from the preceding characters with a space, enter two spaces between APPEND and text.
To APPEND text that ends with a semicolon, end the command with two semicolons (SQL*Plus interprets a single semicolon as an optional command terminator).
Examples
To append a comma delimiter, a space and the column name CITY to the first line of the buffer, make that line the current line by listing the line as follows:
1
1* SELECT DEPARTMENT_ID |
Now enter APPEND:
APPEND , CITY
1
1* SELECT DEPARTMENT_ID, CITY |
To append a semicolon to the line, enter
APPEND ;;
SQL*Plus appends the first semicolon to the line and interprets the second as the terminator for the APPEND command.
Syntax
ARCHIVE LOG {LIST | STOP} | {START | NEXT | ALL | integer } [TO destination]
Starts or stops automatic archiving of online redo log files, manually (explicitly) archives specified redo log files, or displays information about redo log files.
Terms
Requests a display that shows the range of redo log files to be archived, the current log file group's sequence number, and the current archive destination (specified by either the optional command text or by the initialization parameter LOG_ARCHIVE_DEST).
If you are using both ARCHIVELOG mode and automatic archiving, the display might appear like:
ARCHIVE LOG LIST

Database log mode              Archive Mode
Automatic archival             Enabled
Archive destination            /vobs/oracle/dbs/arch
Oldest online log sequence     221
Next log sequence to archive   222
Current log sequence           222
Since the log sequence number of the current log group and the next log group to archive are the same, automatic archival has archived all log groups up to the current one.
If you are using ARCHIVELOG but have disabled automatic archiving, the last three lines might look like:
Oldest online log sequence            222
Next log sequence to archive          222
Current log sequence                  225
If you are using NOARCHIVELOG mode, the "next log sequence to archive" line is suppressed.
The log sequence increments every time the Log Writer begins to write to another redo log file group; it does not indicate the number of logs being used. Every time an online redo log file group is reused, the contents are assigned a new log sequence number.
Disables automatic archival. If the instance is still in ARCHIVELOG mode and all redo log file groups fill, database operation is suspended until a redo log file is archived (for example, until you enter the command ARCHIVE LOG NEXT or ARCHIVE LOG ALL).
Enables automatic archiving. Starts the background process ARCH, which performs automatic archiving as required. If ARCH is started and a filename is supplied, the filename becomes the new default archive destination. ARCH automatically starts on instance startup if the initialization parameter LOG_ARCHIVE_START is set to TRUE.
Manually archives the next online redo log file group that has been filled, but not yet archived.
ALL
Manually archives all filled, but not yet archived, online redo log file groups.
integer
Causes archival of the online redo log file group with log sequence number n. You can specify any redo log file group that is still online. An error occurs if the log file cannot be found online or the sequence number is not valid. This option can be used to re-archive a log file group.
destination
Specifies the destination device or directory in an operating system. Specification of archive destination devices is installation-specific; see your platform-specific Oracle Database documentation for examples of specifying archive destinations. On many operating systems, multiple log files can be spooled to the same tape.
If not specified in the command-line, the archive destination is derived from the initialization parameter LOG_ARCHIVE_DEST. The command ARCHIVE LOG START destination causes the specified device or directory to become the new default archive destination for all future automatic or manual archives. A destination specified with any other option is a temporary destination that is in effect only for the current (manual) archive. It does not change the default archive destination for subsequent automatic archives. For information about specifying archive destinations, see your platform-specific Oracle Database documentation.
Usage
You must be connected to an open Oracle database as SYSOPER, or SYSDBA. For information about connecting to the database, see the CONNECT command.
If an online redo log file group fills and none are available for reuse, database operation is suspended. The condition can be resolved by archiving a log file group.
For information about specifying archive destinations, see your platform-specific Oracle Database documentation.
|
Note:: This command applies only to the current instance. To specify archiving for a different instance or for all instances in a Parallel Server, use the SQL command ALTER SYSTEM. For more information about using SQL commands, see the Oracle Database SQL Reference. |
Examples
To start up the archiver process and begin automatic archiving, using the archive destination specified in LOG_ARCHIVE_DEST, enter
ARCHIVE LOG START
To stop automatic archiving, enter
ARCHIVE LOG STOP
To archive the log file group with sequence number 1001 to the destination specified, enter
ARCHIVE LOG 1001 '/vobs/oracle/dbs/arch'
'arch' specifies the prefix of the filename on the destination device; the remainder of the filename is dependent on the initialization parameter LOG_ARCHIVE_FORMAT, which specifies the filename format for archived redo log files.
Syntax
ATTRIBUTE [type_name.attribute_name [option ...]]
where option represents one of the following clauses:
ALI[AS] alias
CLE[AR]
FOR[MAT] format
LIKE {type_name.attribute_name | alias}
ON | OFF
Specifies display characteristics for a given attribute of an Object Type column, such as the format of NUMBER data. Columns and attributes should not have the same names as they share a common namespace.
Also lists the current display characteristics for a single attribute or all attributes.
Enter ATTRIBUTE followed by type_name.attribute_name and no other clauses to list the current display characteristics for only the specified attribute. Enter ATTRIBUTE with no clauses to list all current attribute display characteristics.
Terms
type_name.attribute_name
Identifies the data item (typically the name of an attribute) within the set of attributes for a given object of Object Type, type_name.
If you select objects of the same Object Type, an ATTRIBUTE command for that type_name.attribute_name applies to all such objects you reference in that session.
ALI[AS] alias
Assigns a specified alias to a type_name.attribute_name, which can be used to refer to the type_name.attribute_name in other ATTRIBUTE commands.
CLE[AR]
Resets the display characteristics for the attribute_name. The format specification must be a text constant such as A10 or $9,999—not a variable.
FOR[MAT] format
Specifies the display format of the column. The format specification must be a text constant such as A10 or $9,999—not a variable.
LIKE {type_name.attribute_name | alias}
Copies the display characteristics of another attribute. LIKE copies only characteristics not defined by another clause in the current ATTRIBUTE command.
ON | OFF
Controls the status of display characteristics for a column. OFF disables the characteristics for an attribute without affecting the characteristics' definition. ON reinstates the characteristics.
Usage
You can enter any number of ATTRIBUTE commands for one or more attributes. All attribute characteristics set for each attribute remain in effect for the remainder of the session, until you turn the attribute OFF, or until you use the CLEAR COLUMN command. Thus, the ATTRIBUTE commands you enter can control an attribute's display characteristics for multiple SQL SELECT commands.
When you enter multiple ATTRIBUTE commands for the same attribute, SQL*Plus applies their clauses collectively. If several ATTRIBUTE commands apply the same clause to the same attribute, the last one entered will control the output.
Examples
To make the LAST_NAME attribute of the Object Type EMPLOYEE_TYPE 20 characters wide, enter
ATTRIBUTE EMPLOYEE_TYPE.LAST_NAME FORMAT A20
To format the SALARY attribute of the Object Type EMPLOYEE_TYPE so that it shows millions of dollars, rounds to cents, uses commas to separate thousands, and displays $0.00 when a value is zero, enter
ATTRIBUTE EMPLOYEE_TYPE.SALARY FORMAT $9,999,990.99
Syntax
BRE[AK] [ON report_element [action [action]]] ...
where report_element has the syntax {column|expr|ROW|REPORT}
and action has the syntax [SKI[P] n|[SKI[P]] PAGE] [NODUP[LICATES]|DUP[LICATES]]
Specifies where changes occur in a report and the formatting action to perform, such as:
suppressing display of duplicate values for a given column
skipping a line each time a given column value changes
(In iSQL*Plus, only when Preformatted Output is ON)
printing computed figures each time a given column value changes or at the end of the report.
See the COMPUTE command.
Enter BREAK with no clauses to list the current BREAK definition.
Terms
ON column [action [action]]
When you include actions, specifies actions for SQL*Plus to take whenever a break occurs in the specified column (called the break column). (column cannot have a table or view appended to it. To achieve this, you can alias the column in the SQL statement.) A break is one of three events, a change in the value of a column or expression, the output of a row, or the end of a report
When you omit actions, BREAK ON column suppresses printing of duplicate values in column and marks a place in the report where SQL*Plus will perform the computation you specify in a corresponding COMPUTE command.
You can specify ON column one or more times. If you specify multiple ON clauses, as in
BREAK ON DEPARTMENT_ID SKIP PAGE ON JOB_ID -
SKIP 1 ON SALARY SKIP 1
the first ON clause represents the outermost break (in this case, ON DEPARTMENT_ID) and the last ON clause represents the innermost break (in this case, ON SALARY). SQL*Plus searches each row of output for the specified breaks, starting with the outermost break and proceeding—in the order you enter the clauses—to the innermost. In the example, SQL*Plus searches for a change in the value of DEPARTMENT_ID, then JOB_ID, then SALARY.
Next, SQL*Plus executes actions beginning with the action specified for the innermost break and proceeding in reverse order toward the outermost break (in this case, from SKIP 1 for ON SALARY toward SKIP PAGE for ON DEPARTMENT_ID). SQL*Plus executes each action up to and including the action specified for the first break encountered in the initial search.
If, for example, in a given row the value of JOB_ID changes—but the values of DEPARTMENT_ID and SALARY remain the same—SQL*Plus skips two lines before printing the row (one as a result of SKIP 1 ON SALARY and one as a result of SKIP 1 ON JOB_ID).
Whenever you use ON column, you should also use an ORDER BY clause in the SQL SELECT command. Typically, the columns used in the BREAK command should appear in the same order in the ORDER BY clause (although all columns specified in the ORDER BY clause need not appear in the BREAK command). This prevents breaks from occurring at meaningless points in the report.
If the BREAK command specified earlier in this section is used, the following SELECT command produces meaningful results:
SELECT DEPARTMENT_ID, JOB_ID, SALARY, LAST_NAME
FROM EMP_DETAILS_VIEW
WHERE SALARY > 12000
ORDER BY DEPARTMENT_ID, JOB_ID, SALARY, LAST_NAME;
All rows with the same DEPARTMENT_ID print together on one page, and within that page all rows with the same JOB_ID print in groups. Within each group of jobs, those jobs with the same SALARY print in groups. Breaks in LAST_NAME cause no action because LAST_NAME does not appear in the BREAK command.
In BREAK commands, nulls are considered equal to each other, but not equal to anything else. This is different to the treatment of nulls in WHERE clauses.
ON expr [action [action]]
When you include actions, specifies actions for SQL*Plus to take when the value of the expression changes.
When you omit actions, BREAK ON expr suppresses printing of duplicate values of expr and marks where SQL*Plus will perform the computation you specify in a corresponding COMPUTE command.
You can use an expression involving one or more table columns or an alias assigned to a report column in a SQL SELECT or SQL*Plus COLUMN command. If you use an expression in a BREAK command, you must enter expr exactly as it appears in the SELECT command. If the expression in the SELECT command is a+b, for example, you cannot use b+a or (a+b) in a BREAK command to refer to the expression in the SELECT command.
The information given for ON column also applies to ON expr.
ON ROW [action [action]]
When you include actions, specifies actions for SQL*Plus to take when a SQL SELECT command returns a row. The ROW break becomes the innermost break regardless of where you specify it in the BREAK command. You should always specify an action when you BREAK on a row.
ON REPORT [action]
Marks a place in the report where SQL*Plus will perform the computation you specify in a corresponding COMPUTE command. Use BREAK ON REPORT in conjunction with COMPUTE to print grand totals or other "grand" computed values.
The REPORT break becomes the outermost break regardless of where you specify it in the BREAK command.
Note that SQL*Plus will not skip a page at the end of a report, so you cannot use BREAK ON REPORT SKIP PAGE.
SKI[P] n
Skips n lines before printing the row where the break occurred. BREAK SKIP n does not work in SET MARKUP HTML ON mode or in iSQL*Plus unless PREFORMAT is SET ON.
[SKI[P]] PAGE
Skips the number of lines that are defined to be a page before printing the row where the break occurred. The number of lines per page can be set with the PAGESIZE clause of the SET command. Note that PAGESIZE only changes the number of lines that SQL*Plus considers to be a page. Therefore, SKIP PAGE may not always cause a physical page break, unless you have also specified NEWPAGE 0. Note also that if there is a break after the last row of data to be printed in a report, SQL*Plus will not skip the page.
NODUP[LICATES]
Prints blanks rather than the value of a break column when the value is a duplicate of the column's value in the preceding row.
DUP[LICATES]
Prints the value of a break column in every selected row.
Enter BREAK with no clauses to list the current break definition.
Usage
Each new BREAK command you enter replaces the preceding one.
To remove the BREAK command, use CLEAR BREAKS.
Examples
To produce a report that prints duplicate job values, prints the average of SALARY, and additionally prints the sum of SALARY, you could enter the following commands. (The example selects departments 50 and 80 and the jobs of clerk and salesman only.)
BREAK ON DEPARTMENT_ID ON JOB_ID DUPLICATES
COMPUTE SUM OF SALARY ON DEPARTMENT_ID
COMPUTE AVG OF SALARY ON JOB_ID
SELECT DEPARTMENT_ID, JOB_ID, LAST_NAME, SALARY
FROM EMP_DETAILS_VIEW
WHERE JOB_ID IN ('SH_CLERK', 'SA_MAN')
AND DEPARTMENT_ID IN (50, 80)
ORDER BY DEPARTMENT_ID, JOB_ID;
DEPARTMENT_ID JOB_ID     LAST_NAME                     SALARY
------------- ---------- ------------------------- ----------
           50 SH_CLERK   Taylor                          3200
              SH_CLERK   Fleaur                          3100
                 .
                 .
                 .
              SH_CLERK   Gates                           2900

DEPARTMENT_ID JOB_ID     LAST_NAME                     SALARY
------------- ---------- ------------------------- ----------
           50 SH_CLERK   Perkins                         2500
              SH_CLERK   Bell                            4000
                 .
                 .
                 .
              SH_CLERK   Grant                           2600
              **********                           ----------
              avg                                        3215

DEPARTMENT_ID JOB_ID     LAST_NAME                     SALARY
------------- ---------- ------------------------- ----------

*************                                      ----------
sum                                                     64300

           80 SA_MAN     Russell                        14000
              SA_MAN     Partners                       13500
              SA_MAN     Errazuriz                      12000
              SA_MAN     Cambrault                      11000
              SA_MAN     Zlotkey                        10500
              **********                           ----------
              avg                                       12200

DEPARTMENT_ID JOB_ID     LAST_NAME                     SALARY
------------- ---------- ------------------------- ----------

*************                                      ----------
sum                                                     61000

25 rows selected.
|
Syntax
BTI[TLE] [printspec [text | variable] ...] | [ON | OFF]
where printspec represents one or more of the following clauses used to place and format the text:
BOLD
CE[NTER]
COL n
FORMAT text
LE[FT]
R[IGHT]
S[KIP] [n]
TAB n
Places and formats a specified title at the bottom of each report page, or lists the current BTITLE definition.
Enter BTITLE with no clauses to list the current BTITLE definition. For a description of the old form of BTITLE, see BTI[TLE] text (obsolete old form).
Terms
Refer to the TTITLE command in this chapter for information on terms and clauses in the BTITLE command syntax.
Usage
If you do not enter a printspec clause before the first occurrence of text, BTITLE left justifies the text. SQL*Plus interprets BTITLE in the new form if a valid printspec clause (LEFT, SKIP, COL, and so on) immediately follows the command name.
SQL*Plus substitution variables (& variables) are expanded before BTITLE is executed. The resulting string is stored as the BTITLE text. During subsequent execution for each page of results, the expanded value of a variable may itself be interpreted as a variable with unexpected results.
You can avoid this double substitution in a BTITLE command by not using the & prefix for variables that are to be substituted on each page of results. If you want to use a substitution variable to insert unchanging text in a BTITLE, enclose it in quotes so that it is only substituted once.
Examples
To set a bottom title with CORPORATE PLANNING DEPARTMENT on the left and a date on the right, enter
BTITLE LEFT 'CORPORATE PLANNING DEPARTMENT' -
RIGHT '1 JAN 2001'
To set a bottom title with CONFIDENTIAL in column 50, followed by
six spaces and
a date, enter
BTITLE COL 50 'CONFIDENTIAL'
TAB 6
'1 JAN 2001'
CHANGE is not available in iSQL*Plus.
Syntax
C[HANGE] sepchar old [sepchar [new [sepchar]]]
Changes the first occurrence of the specified text on the current line in the buffer. The buffer has no command history list and does not record SQL*Plus commands.
Terms
sepchar
Represents any non-alphanumeric character such as "/" or "!". Use a sepchar that does not appear in old or new.
old
Represents the text you wish to change. CHANGE ignores case in searching for old. For example,
CHANGE /aq/aw
finds the first occurrence of "aq", "AQ", "aQ", or "Aq" and changes it to "aw". SQL*Plus inserts the new text exactly as you specify it.
If old is prefixed with "...", it matches everything up to and including the first occurrence of old. If it is suffixed with "...", it matches the first occurrence of old and everything that follows on that line. If it contains an embedded "...", it matches everything from the preceding part of old through the following part of old.
new
Represents the text with which you wish to replace old. If you omit new and, optionally, the second and third sepchars, CHANGE deletes old from the current line of the buffer.
Usage
CHANGE changes the first occurrence of the existing specified text on the current line of the buffer to the new specified text. The current line is marked with an asterisk (*) in the LIST output.
You can also use CHANGE to modify a line in the buffer that has generated an Oracle Database error. SQL*Plus sets the buffer's current line to the line containing the error so that you can make modifications.
To reenter an entire line, you can type the line number followed by the new contents of the line. If you specify a line number larger than the number of lines in the buffer and follow the number with text, SQL*Plus adds the text in a new line at the end of the buffer. If you specify zero ("0") for the line number and follow the zero with text, SQL*Plus inserts the line at the beginning of the buffer (that line becomes line 1).
Examples
Enter 3 so the current line of the buffer contains the following text:
3
3* WHERE JOB_ID IS IN ('CLERK', 'SA_MAN')
|
Enter the following command:
CHANGE /CLERK/SH_CLERK/
The text in the buffer changes as follows:
3* WHERE JOB_ID IS IN ('SH_CLERK', 'SA_MAN')
|
Or enter the following command:
CHANGE /'CLERK',... /'SH_CLERK'/
The original line changes to
3* WHERE JOB_ID IS IN ('SH_CLERK')
|
Or enter the following command:
CHANGE /(...)/('SA_MAN')/
The original line changes to
3* WHERE JOB_ID IS IN ('SA_MAN')
|
You can replace the contents of an entire line using the line number. This entry
3 WHERE JOB_ID IS IN ('SH_CLERK')
causes the second line of the buffer to be replaced with
WHERE JOB_ID IS IN ('SH_CLERK')
Note that entering a line number followed by a string will replace the line regardless of what text follows the line number. For example,
2 CHANGE/OLD/NEW/
will change the second line of the buffer to be
2* C/OLD/NEW/ |
Syntax
CL[EAR] option ...
where option represents one of the following clauses:
BRE[AKS]
BUFF[ER]
COL[UMNS]
COMP[UTES]
SCR[EEN]
SQL
TIMI[NG]
Resets or erases the current value or setting for the specified option.
CLEAR SCREEN command not available in iSQL*Plus.
Terms
BRE[AKS]
Removes the break definition set by the BREAK command.
BUFF[ER]
Clears text from the buffer. CLEAR BUFFER has the same effect as CLEAR SQL, unless you are using multiple buffers.
See SET BUF[FER] {buffer|SQL} (obsolete) for more information about the obsolete form of this command.
COL[UMNS]
Resets column display attributes set by the COLUMN command to default settings for all columns. To reset display attributes for a single column, use the CLEAR clause of the COLUMN command. CLEAR COLUMNS also clears the ATTRIBUTEs for that column.
COMP[UTES]
Removes all COMPUTE definitions set by the COMPUTE command.
SCR[EEN]
CLEAR SCREEN is not available in iSQL*Plus.
SQL
Clears the text from SQL buffer. CLEAR SQL has the same effect as CLEAR BUFFER, unless you are using multiple buffers.
See SET BUF[FER] {buffer|SQL} (obsolete) for more information about the obsolete form of this command.
TIMI[NG]
Deletes all timers created by the TIMING command.
Examples
To clear breaks, enter
CLEAR BREAKS
To clear column definitions, enter
CLEAR COLUMNS
Syntax
COL[UMN] [{column | expr} [option ...]]
where option represents one of the following clauses:
ALI[AS] alias
CLE[AR]
ENTMAP {ON | OFF}
FOLD_A[FTER]
FOLD_B[EFORE]
FOR[MAT] format
HEA[DING] text
JUS[TIFY] {L[EFT] | C[ENTER] | R[IGHT]}
LIKE {expr | alias}
NEWL[INE]
NEW_V[ALUE] variable
NOPRI[NT] | PRI[NT]
NUL[L] text
OLD_V[ALUE] variable
ON | OFF
WRA[PPED] | WOR[D_WRAPPED] | TRU[NCATED]
Specifies display attributes for a given column, such as
text for the column heading
format for NUMBER data
wrapping of column data
Also lists the current display attributes for a single column or all columns.
Enter COLUMN followed by column or expr and no other clauses to list the current display attributes for only the specified column or expression. Enter COLUMN with no clauses to list all current column display attributes.
Terms
{column | expr}
Identifies the data item (typically, the name of a column) in a SQL SELECT command to which the column command refers. If you use an expression in a COLUMN command, you must enter expr exactly as it appears in the SELECT command. If the expression in the SELECT command is a+b, for example, you cannot use b+a or (a+b) in a COLUMN command to refer to the expression in the SELECT command.
If you select columns with the same name from different tables, a COLUMN command for that column name will apply to both columns. That is, a COLUMN command for the column LAST_NAME applies to all columns named LAST_NAME that you reference in this session. COLUMN ignores table name prefixes in SELECT commands. Also, spaces are ignored unless the name is placed in double quotes.
To format the columns differently, assign a unique alias to each column within the SELECT command itself (do not use the ALIAS clause of the COLUMN command) and enter a COLUMN command for each column's alias.
ALI[AS] alias
Assigns a specified alias to a column, which can be used to refer to the column in BREAK, COMPUTE, and other COLUMN commands.
CLE[AR]
Resets the display attributes for the column to default values.
To reset the attributes for all columns, use the CLEAR COLUMNS command. CLEAR COLUMNS also clears the ATTRIBUTEs for that column.
ENTMAP {ON | OFF}
Enables entity mapping to be turned on or off for selected columns in HTML output. This feature enables you to include, for example, HTML hyperlinks in a column of data, while still mapping entities in other columns of the same report. By turning entity mapping off for a column containing HTML hyperlinks, the HTML anchor tag delimiters, <, >, " and &, are correctly interpreted in the report. Otherwise they would be replaced with their respective entities, <, >, " and &, preventing web browsers from correctly interpreting the HTML.
Entities in the column heading and any COMPUTE labels or output appearing in the column are mapped or not mapped according to the value of ENTMAP for the column.
The default setting for COLUMN ENTMAP is the current setting of the MARKUP HTML ENTMAP option.
For more information about the MARKUP HTML ENTMAP option, see SET "MARKUP Options".
FOLD_A[FTER]
Inserts a carriage return after the column heading and after each row in the column. SQL*Plus does not insert an extra carriage return after the last column in the SELECT list. FOLD_A[FTER] does not work in SET MARKUP HTML ON mode or in iSQL*Plus unless PREFORMAT is set ON.
FOLD_B[EFORE]
Inserts a carriage return before the column heading and before each row of the column. SQL*Plus does not insert an extra carriage return before the first column in the SELECT list. FOLD_A[FTER] does not work in SET MARKUP HTML ON mode or in iSQL*Plus unless PREFORMAT is set ON.
FOR[MAT] format
Specifies the display format of the column. The format specification must be a text constant such as A10 or $9,999.
The default width of CHAR, NCHAR, VARCHAR2 (VARCHAR) and NVARCHAR2 (NCHAR VARYING) columns is the width of the column in the database. SQL*Plus formats these datatypes left-justified. If a value does not fit within the column width, SQL*Plus wraps or truncates the character string depending on the setting of SET WRAP.
A LONG, CLOB, NCLOB or XMLType column's width defaults to the value of SET LONGCHUNKSIZE or SET LONG, whichever one is smaller.
To change the width of a datatype to n, use FORMAT An. (A stands for alphabetic.) If you specify a width shorter than the column heading, SQL*Plus truncates the heading.
The default width and format of unformatted DATE columns in SQL*Plus is derived from the NLS_DATE_FORMAT parameter. The NLS_DATE_FORMAT setting is determined by the NLS territory parameter. For example, the default format for the NLS territory, America, is DD-Mon-RR, and the default width is A9. The NLS parameters may be set in your database parameter file, in environment variables or an equivalent platform-specific mechanism. They may also be specified for each session with the ALTER SESSION command. For more information about DATE formats, and about NLS parameters, see the Oracle Database SQL Reference.
You can change the format of any DATE column using the SQL function TO_CHAR in your SQL SELECT statement. You may also wish to use an explicit COLUMN FORMAT command to adjust the column width.
When you use SQL functions like TO_CHAR, Oracle Database automatically enables a very wide column. The default column width may also depend on the character sets in use in SQL*Plus and in the database. To maximize script portability if multiple characters sets are used, Oracle Database recommends using COLUMN FORMAT for each column selected.
To change the width of a DATE column to n, use the COLUMN command with FORMAT An. If you specify a width shorter than the column heading, the heading is truncated.
For numeric columns, COLUMN FORMAT settings take precedence over SET NUMFORMAT settings, which take precedence over SET NUMWIDTH settings.
See "SET NUMF[ORMAT] format" and "SET NUM[WIDTH] {10 | n}".
To change a NUMBER column's width, use FORMAT followed by an element as specified in Table 13-1, "Number Formats".
Table 13-1 Number Formats
| Element | Examples | Description |
|---|---|---|
| , (comma) |
9,999 |
Displays a comma in the specified position. |
| . (period) |
99.99 |
Displays a period (decimal point) to separate the integral and fractional parts of a number. |
| $ |
$9999 |
Displays a leading dollar sign. |
| 0 |
0999 9990 |
Displays leading zeros Displays trailing zeros. |
| 9 |
9999 |
Displays a value with the number of digits specified by the number of 9s. Value has a leading space if positive, a leading minus sign if negative. Blanks are displayed for leading zeroes. A zero (0) is displayed for a value of zero. |
| B |
B9999 |
Displays blanks for the integer part of a fixed-point number when the integer part is zero, regardless of zeros in the format model. |
| C |
C999 |
Displays the ISO currency symbol in the specified position. |
| D |
99D99 |
Displays the decimal character to separate the integral and fractional parts of a number. |
| EEEE |
9.999EEEE |
Displays value in scientific notation (format must contain exactly four "E"s). |
| G |
9G999 |
Displays the group separator in the specified positions in the integral part of a number. |
| L |
L999 |
Displays the local currency symbol in the specified position. |
| MI |
9999MI |
Displays a trailing minus sign after a negative value. Display a trailing space after a positive value. |
| PR |
9999PR |
Displays a negative value in <angle brackets>. Displays a positive value with a leading and trailing space. |
| RN rn |
RN rn |
Displays uppercase Roman numerals. Displays lowercase Roman numerals. Value can be an integer between 1 and 3999. |
| S |
S9999 9999S |
Displays a leading minus or plus sign. Displays a trailing minus or plus sign. |
| TM |
TM |
Displays the smallest number of decimal characters possible. The default is TM9. Fixed notation is used for output up to 64 characters, scientific notation for more than 64 characters. Cannot precede TM with any other element. TM can only be followed by a single 9 or E |
| U |
U9999 |
Displays the dual currency symbol in the specified position. |
| V |
999V99 |
Displays value multiplied by 10n, where n is the number of 9's after the V. |
| X |
XXXX xxxx |
Displays the hexadecimal value for the rounded value of the specified number of digits. |
The MI and PR format elements can only appear in the last position of a number format model. The S format element can only appear in the first or last position.
If a number format model does not contain the MI, S or PR format elements, negative return values automatically contain a leading negative sign and positive values automatically contain a leading space.
A number format model can contain only a single decimal character (D) or period (.), but it can contain multiple group separators (G) or commas (,). A group separator or comma cannot appear to the right of a decimal character or period in a number format model.
SQL*Plus formats NUMBER data right-justified. A NUMBER column's width equals the width of the heading or the width of the FORMAT plus one space for the sign, whichever is greater. If you do not explicitly use COLUMN FORMAT or SET NUMFORMAT, then the column's width will always be at least the value of SET NUMWIDTH.
SQL*Plus may round your NUMBER data to fit your format or field width.
If a value cannot fit in the column, SQL*Plus displays pound signs (#) instead of the number.
If a positive value is extremely large and a numeric overflow occurs when rounding a number, then the infinity sign (~) replaces the value. Likewise, if a negative value is extremely small and a numeric overflow occurs when rounding a number, then the negative infinity sign replaces the value (-~).
HEA[DING] text
Defines a column heading. If you do not use a HEADING clause, the column's heading defaults to column or expr. If text contains blanks or punctuation characters, you must enclose it with single or double quotes. Each occurrence of the HEADSEP character (by default, "|") begins a new line.
For example,
COLUMN LAST_NAME HEADING 'Employee |Name'
would produce a two-line column heading.
See SET HEADS[EP] { | | c | ON | OFF} in this chapter for information on changing the HEADSEP character.
JUS[TIFY] {L[EFT] | C[ENTER] | R[IGHT]}
Aligns the heading. If you do not use a JUSTIFY clause, headings for NUMBER columns default to RIGHT and headings for other column types default to LEFT.
LIKE {expr | alias}
Copies the display attributes of another column or expression (whose attributes you have already defined with another COLUMN command). LIKE copies only attributes not defined by another clause in the current COLUMN command.
NEWL[INE]
Starts a new line before displaying the column's value. NEWLINE has the same effect as FOLD_BEFORE. NEWL[INE] does not work in SET MARKUP HTML ON mode or in iSQL*Plus unless PREFORMAT is SET ON.
NEW_V[ALUE] variable
Specifies a variable to hold a column value. You can reference the variable in TTITLE commands. Use NEW_VALUE to display column values or the date in the top title. You must include the column in a BREAK command with the SKIP PAGE action. The variable name cannot contain a pound sign (#).
NEW_VALUE is useful for master/detail reports in which there is a new master record for each page. For master/detail reporting, you must also include the column in the ORDER BY clause. See the example at the end of this command description.
Variables specified with NEW_V[ALUE] are expanded before TTITLE is executed. The resulting string is stored as the TTITLE text. During subsequent execution for each page of the report, the expanded value of a variable may itself be interpreted as a variable with unexpected results.
You can avoid this double substitution in a TTITLE command by not using the & prefix for NEW_V[ALUE] variables that are to be substituted on each page of the report. If you want to use a substitution variable to insert unchanging text in a TTITLE, enclose it in quotes so that it is only substituted once.
For information on displaying a column value in the bottom title, see OLD_V[ALUE] variable below. For more information on referencing variables in titles, see the TTITLE command later in this chapter. For information on formatting and valid format models, see FOR[MAT] format above.
NOPRI[NT] | PRI[NT]
Controls the printing of the column (the column heading and all the selected values). NOPRINT turns off the screen output and printing of the column. PRINT turns the printing of the column ON.
NUL[L] text
Controls the text SQL*Plus displays for null values in the given column. The default is a white space. SET NULL controls the text displayed for all null values for all columns, unless overridden for a specific column by the NULL clause of the COLUMN command. When a NULL value is selected, a variable's type always becomes CHAR so the SET NULL text can be stored in it.
OLD_V[ALUE] variable
Specifies a variable to hold a column value. You can reference the variable in BTITLE commands. Use OLD_VALUE to display column values in the bottom title. You must include the column in a BREAK command with the SKIP PAGE action.
OLD_VALUE is useful for master/detail reports in which there is a new master record for each page. For master/detail reporting, you must also include the column in the ORDER BY clause.
Variables specified with OLD_V[ALUE] are expanded before BTITLE is executed. The resulting string is stored as the BTITLE text. During subsequent execution for each page of the report, the expanded value of a variable may itself be interpreted as a variable with unexpected results.
You can avoid this double substitution in a BTITLE command by not using the & prefix for OLD_V[ALUE] variables that are to be substituted on each page of the report. If you want to use a substitution variable to insert unchanging text in a BTITLE, enclose it in quotes so that it is only substituted once.
For information on displaying a column value in the top title, see NEW_V[ALUE] variable. For more information on referencing variables in titles, see the TTITLE command later in this chapter.
ON | OFF
Controls the status of display attributes for a column. OFF disables the attributes for a column without affecting the attributes' definition. ON reinstates the attributes.
WRA[PPED] | WOR[D_WRAPPED] | TRU[NCATED]
Specifies how SQL*Plus will treat a datatype or DATE string that is too wide for a column. WRAPPED wraps the string within the column bounds, beginning new lines when required. When WORD_WRAP is enabled, SQL*Plus left justifies each new line, skipping all leading whitespace (for example, returns, newline characters, tabs and spaces), including embedded newline characters. Embedded whitespace not on a line boundary is not skipped. TRUNCATED truncates the string at the end of the first line of display.
Usage
The COLUMN commands you enter can control a column's display attributes for multiple SQL SELECT commands.
You can enter any number of COLUMN commands for one or more columns. All column attributes set for each column remain in effect for the remainder of the session, until you turn the column OFF, or until you use the CLEAR COLUMN command.
When you enter multiple COLUMN commands for the same column, SQL*Plus applies their clauses collectively. If several COLUMN commands apply the same clause to the same column, the last one entered will control the output.
Examples
To make the LAST_NAME column 20 characters wide and display EMPLOYEE NAME on two lines as the column heading, enter
COLUMN LAST_NAME FORMAT A20 HEADING 'EMPLOYEE|NAME'
To format the SALARY column so that it shows millions of dollars, rounds to cents, uses commas to separate thousands, and displays $0.00 when a value is zero, enter
COLUMN SALARY FORMAT $9,999,990.99
To assign the alias NET to a column containing a long expression, to display the result in a dollar format, and to display <NULL> for null values, you might enter
COLUMN SALARY+COMMISSION_PCT+BONUS-EXPENSES-INS-TAX ALIAS NET
COLUMN NET FORMAT $9,999,999.99 NULL '<NULL>'
Note that the example divides this column specification into two commands. The first defines the alias NET, and the second uses NET to define the format.
Also note that in the first command you must enter the expression exactly as you enter it in the SELECT command. Otherwise, SQL*Plus cannot match the COLUMN command to the appropriate column.
To wrap long values in a column named REMARKS, you can enter
COLUMN REMARKS FORMAT A20 WRAP
CUSTOMER     DATE        QUANTITY REMARKS
----------   ---------   -------- --------------------
123          25-AUG-2001 144      This order must be s
                                  hipped by air freigh
                                  t to ORD
|
If you replace WRAP with WORD_WRAP, REMARKS looks like this:
CUSTOMER     DATE        QUANTITY   REMARKS
----------   ---------   --------   ---------------------
123          25-AUG-2001 144        This order must be
                                    shipped by air freight
                                    to ORD
|
If you specify TRUNCATE, REMARKS looks like this:
CUSTOMER DATE QUANTITY REMARKS ---------- --------- -------- -------------------- 123 25-AUG-2001 144 This order must be s |
To print the current date and the name of each job in the top title, enter the following. Use the EMPLOYEES table of the HR schema instead of EMP_DETAILS_VIEW.
For details on creating a date variable, see "Displaying the Current Date in Titles".
Your two page report would look similar to the following report, with "Job Report" centered within your current linesize:
COLUMN JOB_ID NOPRINT NEW_VALUE JOBVAR
COLUMN TODAY  NOPRINT NEW_VALUE DATEVAR
BREAK ON JOB_ID SKIP PAGE ON TODAY
TTITLE CENTER 'Job Report' RIGHT DATEVAR  SKIP 2 -
LEFT 'Job:     ' JOBVAR SKIP 2
SELECT TO_CHAR(SYSDATE, 'MM/DD/YYYY') TODAY,
LAST_NAME, JOB_ID, MANAGER_ID, HIRE_DATE, SALARY, DEPARTMENT_ID
FROM EMPLOYEES WHERE JOB_ID IN ('MK_MAN', 'SA_MAN')
ORDER BY JOB_ID, LAST_NAME;
|
To change the default format of DATE columns to 'YYYY-MM-DD', you can enter
ALTER SESSION SET NLS_DATE_FORMAT = 'YYYY-MM-DD';
Session altered. |
To display the change, enter a SELECT statement, such as:
SELECT HIRE_DATEFROM EMPLOYEESWHERE EMPLOYEE_ID = 206;
Job Report 04/19/01 Job: SA_MAN HIRE_DATE ---------- 1994-06-07 |
See the Oracle Database SQL Reference for information on the ALTER SESSION command.
Syntax
COMP[UTE] [function [LAB[EL] text] ...
OF {expr | column | alias} ...
ON {expr | column | alias | REPORT | ROW} ...]
In combination with the BREAK command, calculates and prints summary lines, using various standard computations on subsets of selected rows. It also lists all COMPUTE definitions. For details on how to create summaries, see "Clarifying Your Report with Spacing and Summary Lines".
Terms
function ...
Represents one of the functions listed in Table 13-2, "COMPUTE Functions". If you specify more than one function, use spaces to separate the functions.
COMPUTE command functions are always executed in the sequence AVG, COUNT, MINIMUM, MAXIMUM, NUMBER, SUM, STD, VARIANCE, regardless of their order in the COMPUTE command.
Table 13-2 COMPUTE Functions
| Function | Computes | Applies to Datatypes |
|---|---|---|
AVG |
Average of non-null values | NUMBER |
COU[NT] |
Count of non-null values | all types |
MIN[IMUM] |
Minimum value | NUMBER, CHAR, NCHAR, VARCHAR2 (VARCHAR), NVARCHAR2 (NCHAR VARYING) |
MAX[IMUM] |
Maximum value | NUMBER, CHAR, NCHAR, VARCHAR2 (VARCHAR), NVARCHAR2 (NCHAR VARYING) |
NUM[BER] |
Count of rows | all types |
SUM |
Sum of non-null values | NUMBER |
STD |
Standard deviation of non-null values | NUMBER |
VAR[IANCE] |
Variance of non-null values | NUMBER |
LAB[EL] text
Defines the label to be printed for the computed value. If no LABEL clause is used, text defaults to the unabbreviated function keyword. You must place single quotes around text containing spaces or punctuation. The label prints left justified and truncates to the column width or linesize, whichever is smaller. The maximum label length is 500 characters.
The label for the computed value appears in the break column specified. To suppress the label, use the NOPRINT option of the COLUMN command on the break column.
If you repeat a function in a COMPUTE command, SQL*Plus issues a warning and uses the first occurrence of the function.
With ON REPORT and ON ROW computations, the label appears in the first column listed in the SELECT statement. The label can be suppressed by using a NOPRINT column first in the SELECT statement. When you compute a function of the first column in the SELECT statement ON REPORT or ON ROW, then the computed value appears in the first column and the label is not displayed. To see the label, select a dummy column first in the SELECT list.
OF {expr | column | alias} ...
In the OF clause, you can refer to an expression or function reference in the SELECT statement by placing the expression or function reference in double quotes. Column names and aliases do not need quotes.
ON {expr | column | alias | REPORT | ROW} ...
If multiple COMPUTE commands reference the same column in the ON clause, only the last COMPUTE command applies.
To reference a SQL SELECT expression or function reference in an ON clause, place the expression or function reference in quotes. Column names and aliases do not need quotes.
Enter COMPUTE without clauses to list all COMPUTE definitions.
Usage
In order for the computations to occur, the following conditions must all be true:
One or more of the expressions, columns, or column aliases you reference in the OF clause must also be in the SELECT command.
The expression, column, or column alias you reference in the ON clause must occur in the SELECT command and in the most recent BREAK command.
If you reference either ROW or REPORT in the ON clause, also reference ROW or REPORT in the most recent BREAK command.
To remove all COMPUTE definitions, use the CLEAR COMPUTES command.
Note that if you use the NOPRINT option for the column on which the COMPUTE is being performed, the COMPUTE result is also suppressed.
Examples
To subtotal the salary for the "account manager", AC_MGR, and "salesman", SA_MAN, job classifications with a compute label of "TOTAL", enter
BREAK ON JOB_ID SKIP 1;
COMPUTE SUM LABEL 'TOTAL' OF SALARY ON JOB_ID;
SELECT JOB_ID, LAST_NAME, SALARY
FROM EMP_DETAILS_VIEW
WHERE JOB_ID IN ('AC_MGR', 'SA_MAN')
ORDER BY JOB_ID, SALARY;
JOB_ID     LAST_NAME                     SALARY
---------- ------------------------- ----------
AC_MGR     Higgins                        12000
**********                           ----------
TOTAL                                     12000
SA_MAN     Zlotkey                        10500
           Cambrault                      11000
           Errazuriz                      12000
           Partners                       13500
           Russell                        14000
**********                           ----------
TOTAL                                     61000

6 rows selected.
|
To calculate the total of salaries greater than 12,000 on a report, enter
COMPUTE SUM OF SALARY ON REPORT
BREAK ON REPORT
COLUMN DUMMY HEADING ''
SELECT '   ' DUMMY, SALARY, EMPLOYEE_ID
FROM EMP_DETAILS_VIEW
WHERE SALARY > 12000
ORDER BY SALARY;
SALARY EMPLOYEE_ID
--- ---------- -----------
         13000         201
         13500         146
         14000         145
         17000         101
         17000         102
         24000         100
    ----------
sum      98500

6 rows selected.
|
To calculate the average and maximum salary for the executive and accounting departments, enter
BREAK ON DEPARTMENT_NAME SKIP 1
COMPUTE AVG LABEL 'Dept Average' -
        MAX LABEL 'Dept Maximum' -
        OF SALARY ON DEPARTMENT_NAME
SELECT DEPARTMENT_NAME, LAST_NAME, SALARY
FROM EMP_DETAILS_VIEW
WHERE DEPARTMENT_NAME IN ('Executive', 'Accounting')
ORDER BY DEPARTMENT_NAME;
DEPARTMENT_NAME                LAST_NAME                     SALARY
------------------------------ ------------------------- ----------
Accounting                     Higgins                        12000
                               Gietz                           8300
******************************                           ----------
Dept Average                                                  10150
Dept Maximum                                                  12000

Executive                      King                           24000
                               Kochhar                        17000
                               De Haan                        17000
******************************                           ----------
Dept Average                                             19333.3333
Dept Maximum                                                  24000
|
To sum salaries for departments <= 20 without printing the compute label, enter
COLUMN DUMMY NOPRINT
COMPUTE SUM OF SALARY ON DUMMY
BREAK ON DUMMY SKIP 1
SELECT DEPARTMENT_ID DUMMY, DEPARTMENT_ID, LAST_NAME, SALARY
FROM EMP_DETAILS_VIEW
WHERE DEPARTMENT_ID <= 20
ORDER BY DEPARTMENT_ID;
DEPARTMENT_ID LAST_NAME                     SALARY
------------- ------------------------- ----------
           10 Whalen                          4400
                                        ----------
                                              4400

           20 Hartstein                      13000
           20 Fay                             6000
                                        ----------
                                             19000
|
To total the salary at the end of the report without printing the compute label, enter
COLUMN DUMMY NOPRINT
COMPUTE SUM OF SALARY ON DUMMY
BREAK ON DUMMY
SELECT NULL DUMMY, DEPARTMENT_ID, LAST_NAME, SALARY
FROM EMP_DETAILS_VIEW
WHERE DEPARTMENT_ID <= 30
ORDER BY DEPARTMENT_ID;
DEPARTMENT_ID LAST_NAME                     SALARY
------------- ------------------------- ----------
           10 Whalen                          4400
           20 Hartstein                      13000
           20 Fay                             6000
           30 Raphaely                       11000
           30 Khoo                            3100
           30 Baida                           2900
           30 Tobias                          2800
           30 Himuro                          2600
           30 Colmenares                      2500
                                        ----------
                                             48300

9 rows selected.
|
Syntax
CONN[ECT] { logon | / } [AS {SYSOPER | SYSDBA}]
where logon has the syntax username[/password] [@connect_identifier]
Connects a given username to the Oracle Database. When you run a CONNECT command, the site profile, glogin.sql, and the user profile, login.sql, are executed.
CONNECT does not reprompt for username or password if the initial connection does not succeed.
Terms
username[/password]
The username and password you use to connect to Oracle Database. If you omit username and password, SQL*Plus prompts you for them. If you enter a slash (/) or enter Return or click Execute when prompted for username, SQL*Plus logs you in using a default logon. See "/ (slash)" for more information.
If you omit only , SQL*Plus prompts you for . When prompting, SQL*Plus does not display on your terminal screen.
See the PASSWORD command for information about changing your password in SQL*Plus, and see "Changing Your Password in iSQL*Plus" for information about changing passwords in iSQL*Plus.
An Oracle Net connect identifier. The exact syntax depends on the Oracle Net communications protocol your Oracle Database installation uses. For more information, refer to the Oracle Net manual for your protocol or contact your DBA. SQL*Plus does not prompt for a service name, but uses your default database if you do not include a connect identifier.
/ (slash)
Represents a default logon using operating system authentication. You cannot enter a connect_identifier if you use a default logon. In a default logon, SQL*Plus typically attempts to log you in using the username OPS$name, where name is your operating system username. See the Oracle Database Administrator's Guide for information about operating system authentication.
The AS clause enables privileged connections by users who have been granted SYSOPER or SYSDBA system privileges. You can use either of these privileged connections with the default logon, /.
For information about system privileges, see the Oracle Database Administrator's Guide.
Usage
CONNECT commits the current transaction to the database, disconnects the current username from Oracle Database, and reconnects with the specified username.
If you log on or connect as a user whose account has expired, SQL*Plus prompts you to change your password before you can connect.
If an account is locked, a message is displayed and connection into that account (as that user) is not permitted until the account is unlocked by your DBA.
For more information about user account management, refer to the CREATE USER, ALTER USER and the CREATE PROFILE commands in the Oracle Database SQL Reference.
Examples
To connect across Oracle Net with username HR and password HR to the database known by the Oracle Net alias as FLEETDB, enter
CONNECT HR/your_password@FLEETDB
To connect as user HR, letting SQL*Plus prompt you for the password, enter
CONNECT HR
For more information about setting up your password file, refer to the Oracle Database Administrator's Guide.
To use a password file to connect to an instance on the current node as a privileged user named HR with the password HR, enter
CONNECT HR/your_password AS SYSDBA
To connect to an instance on the current node as a privileged default user, enter
CONNECT / AS SYSDBA
The COPY command is not being enhanced to handle datatypes or features introduced with, or after Oracle8i. The COPY command is likely to be made obsolete in a future release.
For COPY command details and syntax, see Appendix B, " SQL*Plus COPY Command".
Syntax
DEF[INE] [variable] | [variable = text]
Specifies a user or predefined variable and assigns a CHAR value to it, or lists the value and variable type of a single variable or all variables.
Terms
variable
Represents the user or predefined variable whose value you wish to assign or list.
text
Represents the CHAR value you wish to assign to variable. Enclose text in single quotes if it contains punctuation or blanks.
variable = text
Defines (names) a substitution variable and assigns it a CHAR value.
Enter DEFINE followed by variable to list the value and type of variable. Enter DEFINE with no clauses to list the values and types of all substitution variables.
Usage
Defined variables retain their values until you:
enter a new DEFINE command referencing the variable
reference the variable in the NEW_VALUE or OLD_VALUE clause of a COLUMN command and then reference the column in a SELECT command
EXIT SQL*Plus
Whenever you run a stored query or script, SQL*Plus substitutes the value of variable for each substitution variable referencing variable (in the form &variable or &&variable). SQL*Plus will not prompt you for the value of variable in this session until you UNDEFINE variable.
If the value of a defined variable extends over multiple lines (using the SQL*Plus command continuation character), SQL*Plus replaces each continuation character and carriage return with a space. For example, SQL*Plus interprets
DEFINE TEXT = 'ONE-
TWO-
THREE'
as
DEFINE TEXT = 'ONE TWO THREE'
You should avoid defining variables with names that may be identical to values that you will pass to them, as unexpected results can occur. If a value supplied for a defined variable matches a variable name, then the contents of the matching variable are used instead of the supplied value.
Some variables are predefined when SQL*Plus starts. Enter DEFINE to see their definitions.
Examples
To assign the value MANAGER to the variable POS, type:
DEFINE POS = MANAGER
If you execute a command containing a reference to &POS, SQL*Plus substitutes the value MANAGER for &POS and will not prompt you for a POS value.
To assign the CHAR value 20 to the variable DEPARTMENT_ID, type:
DEFINE DEPARTMENT_ID = 20
Even though you enter the number 20, SQL*Plus assigns a CHAR value to DEPARTMENT_ID consisting of two characters, 2 and 0.
To list the definition of DEPARTMENT_ID, enter
DEFINE DEPARTMENT_ID
DEFINE DEPARTMENT_ID = "20" (CHAR) |
This result shows that the value of DEPARTMENT_ID is 20.
There are eight variables defined during SQL*Plus installation. These variables only differ from user defined variables by having predefined values.
Table 13-3 Variables Predefined at SQL*Plus Installation
Contains the connection identifier as supplied by the user to make a connection where it is available.
Contains the current date, or a fixed string. _DATE can be either dynamic, showing the current date which is the default, or it can be set to a fixed string. The current date is formatted using the value of NLS_DATE_FORMAT.
Because _DATE can be used as a normal substitution variable, users may put it in TTITLE. If _DATE is dynamic and is used in TTITLE it will have all the normal variable semantics. If it is used with an ampersand than the value will be set to the time when the TTITLE command is executed. If it is used without an ampersand prefix, it will be re-evaluated for each page. For long reports with _DATE in the TTITLE or with multiple references to &_DATE, different times may be displayed for each occurrence of the variable.
User's using _DATE in TTITLEs will almost certainly want to use an ampersand: &_DATE, so that each page of the report has exactly the same timestamp. This is especially true when the current date format contains a "seconds" component.
A DEFINE (with no arguments) or dereference using &_DATE will give the current date.
The _DATE value can be UNDEFINED, or set to a fixed string with an explicit DEFINE _DATE.
You can re-enable the default dynamic date behavior with:
DEFINE _DATE = "" (an empty string)
_DATE enables time values to be included in your SQL*Plus prompt.
Specifies the default editor used by the EDIT command.
During SQL*Plus installation on Windows operating systems, it is set to Notepad. On UNIX operating systems, it is set to the value of the UNIX environment variable, EDITOR, if it exists, otherwise it is set to Ed.
You can use the DEFINE command to redefine _EDITOR, to hold the name of your preferred text editor. For example, to define the editor used by EDIT to be vi, enter the following command:
DEFINE _EDITOR = vi
Contains the current version of the installed Oracle Database in the form:
Oracle Database 10g Release 10.1.0.2.0 - Production
Contains the full release number of the installed Oracle Database in the form:
101020000
Contains a value indicating the privilege level of the current connection. It contains one of the following values:
AS SYSDBA
AS SYSOPER
An empty string for normal-user connections or when there is no connection.
AS SYSDBA and AS SYSOPER are database administrator level privileges.
Contains the full release number of the installed SQL*Plus component in the form:
101020000
Contains the user name connected to the current connection.
You can view the value of each of these variables with the DEFINE command.
These variables can be accessed and redefined like any other substitution variable. They can be used in TTITLE, in '&' substitution variables, or in your SQL*Plus command-line prompt.
You can use the DEFINE command to view the definitions of these eight predefined variables in the same way as you view other DEFINE definitions. You can also use the DEFINE command to redefine their values, or you can use the UNDEFINE command to remove their definitions and make them unavailable.
To view a specific variable definition, enter
DEFINE variable
where variable is the name of the substitution variable whose definition you want to view.
To view all predefined and user defined variable definitions, enter
DEFINE
All predefined and all user defined variable definitions are displayed.
You can use UNDEFINE to remove a substitution variable definition and make it unavailable.
Examples of Use of Predefined Variables
To change your SQL*Plus prompt to display your connection identifier, enter:
SET SQLPROMPT '_CONNECT_IDENTIFIER > '
To view the predefined value of the _SQLPLUS_RELEASE substitution variable, enter
DEFINE _SQLPLUS_RELEASE
| DEFINE _SQLPLUS_RELEASE = "101000100" (CHAR) |
DEL is not available in iSQL*Plus.
Syntax
DEL [n | n m | n * | n LAST | * | * n | * LAST | LAST]
Deletes one or more lines of the buffer.
SQL*Plus commands are not stored in the buffer. There is no history of commands previously entered in the buffer.
Terms
Enter DEL with no clauses to delete the current line of the buffer.
Usage
DEL makes the following line of the buffer (if any) the current line. You can enter DEL several times to delete several consecutive lines.
|
Note: DEL is a SQL*Plus command and DELETE is a SQL command. For more information about the SQL DELETE command, see the Oracle Database SQL Reference. |
Examples
Assume the SQL buffer contains the following query:
SELECT LAST_NAME, DEPARTMENT_ID
FROM EMP_DETAILS_VIEW
WHERE JOB_ID = 'SA_MAN'
ORDER BY DEPARTMENT_ID;
To make the line containing the WHERE clause the current line, you could enter
LIST 3
3* WHERE JOB_ID = 'SA_MAN' |
followed by
DEL
The SQL buffer now contains the following lines:
SELECT LAST_NAME, DEPARTMENT_ID
FROM EMP_DETAILS_VIEW
ORDER BY DEPARTMENT_ID
To delete the third line of the buffer, enter
DEL 3
The SQL buffer now contains the following lines:
SELECT LAST_NAME, DEPARTMENT_ID FROM EMP_DETAILS_VIEW |
Syntax
DESC[RIBE] {[schema.]object[@connect_identifier]}
Lists the column definitions for the specified table, view or synonym, or the specifications for the specified function or procedure.
Terms
schema
Represents the schema where the object resides. If you omit schema, SQL*Plus assumes you own object.
object
Represents the table, view, type, procedure, function, package or synonym you wish to describe.
@connect_identifier
Consists of the database link name corresponding to the database where object exists. For more information on which privileges allow access to another table in a different schema, refer to the Oracle Database SQL Reference.
Usage
The description for tables, views, types and synonyms contains the following information:
each column's name
whether or not null values are allowed (NULL or NOT NULL) for each column
datatype of columns, for example, CHAR, DATE, LONG, LONGRAW, NUMBER, RAW, ROWID, VARCHAR2 (VARCHAR), or XMLType
precision of columns (and scale, if any, for a numeric column)
When you do a DESCRIBE, VARCHAR columns are returned with a type of VARCHAR2.
The DESCRIBE command enables you to describe objects recursively to the depth level set in the SET DESCRIBE command. You can also display the line number and indentation of the attribute or column name when an object contains multiple object types. For more information, see the SET command later in this chapter.
To control the width of the data displayed, use the SET LINESIZE command.
Columns output for the DESCRIBE command are typically allocated a proportion of the linesize currently specified. Decreasing or increasing the linesize with the SET LINESIZE command usually makes each column proportionally smaller or larger. This may give unexpected text wrapping in your display. For more information, see the SET command later in this chapter.
The description for functions and procedures contains the following information:
the type of PL/SQL object (function or procedure)
the name of the function or procedure
the type of value returned (for functions)
the argument names, types, whether input or output, and default values, if any
Examples
To describe the view EMP_DETAILS_VIEW, enter
DESCRIBE EMP_DETAILS_VIEW
Name Null? Type ----------------------------------------- -------- ---------------- EMPLOYEE_ID NOT NULL NUMBER(6) JOB_ID NOT NULL VARCHAR2(10) MANAGER_ID NUMBER(6) DEPARTMENT_ID NUMBER(4) LOCATION_ID NUMBER(4) COUNTRY_ID CHAR(2) FIRST_NAME VARCHAR2(20) LAST_NAME NOT NULL VARCHAR2(25) SALARY NUMBER(8,2) COMMISSION_PCT NUMBER(2,2) DEPARTMENT_NAME NOT NULL VARCHAR2(30) JOB_TITLE NOT NULL VARCHAR2(35) CITY NOT NULL VARCHAR2(30) STATE_PROVINCE VARCHAR2(25) COUNTRY_NAME VARCHAR2(40) REGION_NAME VARCHAR2(25) |
To describe a procedure called CUSTOMER_LOOKUP, enter
DESCRIBE customer_lookup
PROCEDURE customer_lookup Argument Name Type In/Out Default? ---------------------- -------- -------- --------- CUST_ID NUMBER IN CUST_NAME VARCHAR2 OUT |
To create and describe the package APACK that contains the procedures aproc and bproc, enter
CREATE PACKAGE apack AS
PROCEDURE aproc(P1 CHAR, P2 NUMBER);
PROCEDURE bproc(P1 CHAR, P2 NUMBER);
END apack;
/
Package created. |
DESCRIBE apack
PROCEDURE APROC Argument Name Type In/Out Default? ------------------------------ ----------------------- ------ -------- P1 CHAR IN P2 NUMBER IN PROCEDURE BPROC Argument Name Type In/Out Default? ------------------------------ ----------------------- ------ -------- P1 CHAR IN P2 NUMBER IN |
To create and describe the object type ADDRESS that contains the attributes STREET and CITY, enter
CREATE TYPE ADDRESS AS OBJECT
  ( STREET  VARCHAR2(20),
    CITY    VARCHAR2(20)
  );
/
Type created. |
DESCRIBE address
Name Null? Type ----------------------------------------- -------- ---------------------- STREET VARCHAR2(20) CITY VARCHAR2(20) |
To create and describe the object type EMPLOYEE that contains the attributes LAST_NAME, EMPADDR, JOB_ID and SALARY, enter
CREATE TYPE EMPLOYEE AS OBJECT
(LAST_NAME VARCHAR2(30),
EMPADDR ADDRESS,
JOB_ID VARCHAR2(20),
SALARY NUMBER(7,2)
);
/
Type created. |
DESCRIBE employee
Name Null? Type ----------------------------------------- -------- ---------------------- LAST_NAME VARCHAR2(30) EMPADDR ADDRESS JOB_ID VARCHAR2(20) SALARY NUMBER(7,2) |
To create and describe the object type addr_type as a table of the object type ADDRESS, enter
CREATE TYPE addr_type IS TABLE OF ADDRESS;/
Type created. |
DESCRIBE addr_type
addr_type TABLE OF ADDRESS Name Null? Type ----------------------------------------- -------- ---------------------- STREET VARCHAR2(20) CITY VARCHAR2(20) |
To create and describe the object type addr_varray as a varray of the object type ADDRESS, enter
CREATE TYPE addr_varray AS VARRAY(10) OF ADDRESS;/
Type created. |
DESCRIBE addr_varray
addr_varray VARRAY(10) OF ADDRESS Name Null? Type ----------------------------------------- -------- ---------------------- STREET VARCHAR2(20) CITY VARCHAR2(20) |
To create and describe the table department that contains the columns DEPARTMENT_ID, PERSON and LOC, enter
CREATE TABLE department
(DEPARTMENT_ID NUMBER,
PERSON EMPLOYEE,
LOC NUMBER
);
/
Table created. |
DESCRIBE department
Name Null? Type ----------------------------------------- -------- ---------------------- DEPARTMENT_ID NUMBER PERSON EMPLOYEE LOC NUMBER |
To create and describe the object type rational that contains the attributes NUMERATOR and DENOMINATOR, and the METHOD rational_order, enter
CREATE OR REPLACE TYPE rational AS OBJECT
(NUMERATOR NUMBER,
DENOMINATOR NUMBER,
MAP MEMBER FUNCTION rational_order -
RETURN DOUBLE PRECISION,
PRAGMA RESTRICT_REFERENCES
(rational_order, RNDS, WNDS, RNPS, WNPS) );
/
CREATE OR REPLACE TYPE BODY rational AS OBJECT
MAP MEMBER FUNCTION rational_order -
RETURN DOUBLE PRECISION IS
BEGIN
  RETURN NUMERATOR/DENOMINATOR;
END;
END;
/
DESCRIBE rational
Name Null? Type ------------------------------ -------- ------------ NUMERATOR NUMBER DENOMINATOR NUMBER METHOD ------ MAP MEMBER FUNCTION RATIONAL_ORDER RETURNS NUMBER |
To create a table which contains a column of XMLType, and describe it, enter
CREATE TABLE PROPERTY (Price NUMBER, Description SYS.XMLTYPE);
Table created |
DESCRIBE PROPERTY;
Name Null? Type ----------------------------------------- -------- ---------------------- PRICE NUMBER DESCRIPTION SYS.XMLTYPE |
To format the DESCRIBE output use the SET command as follows:
SET LINESIZE 80
SET DESCRIBE DEPTH 2
SET DESCRIBE INDENT ON
SET DESCRIBE LINE OFF
To display the settings for the object, use the SHOW command as follows:
SHOW DESCRIBE
DESCRIBE DEPTH 2 LINENUM OFF INDENT ON |
DESCRIBE employee
Name Null? Type ----------------------------------------- -------- ---------------------- FIRST_NAME VARCHAR2(30) EMPADDR ADDRESS STREET VARCHAR2(20) CITY VARCHAR2(20) JOB_ID VARCHAR2(20) SALARY NUMBER(7,2) |
For more information on using the CREATE TYPE command, see your Oracle Database SQL Reference.
For information about using the SET DESCRIBE and SHOW DESCRIBE commands, see the SET and SHOW commands.
Syntax
DISC[ONNECT]
Commits pending changes to the database and logs the current username out of Oracle Database, but does not exit SQL*Plus.
Usage
Use DISCONNECT within a script to prevent user access to the database when you want to log the user out of Oracle Database but have the user remain in SQL*Plus. In SQL*Plus command-line, use EXIT or QUIT to log out of Oracle Database and return control to your computer's operating system. In iSQL*Plus, click the Logout button to log out of Oracle Database.
Examples
Your script might begin with a CONNECT command and end with a DISCONNECT, as shown later.
CONNECT HR/your_password
SELECT LAST_NAME, DEPARTMENT_NAME FROM EMP_DETAILS_VIEW;
DISCONNECT
SET INSTANCE FIN2
CONNECT HR2/your_password
EDIT is not available in iSQL*Plus.
Syntax
ED[IT] [file_name[.ext]]
where file_name[.ext] represents the file you wish to edit (typically a script).
Invokes an operating system text editor on the contents of the specified file or on the contents of the buffer. The buffer has no command history list and does not record SQL*Plus commands.
Enter EDIT with no filename to edit the contents of the SQL buffer with the operating system text editor.
Usage
If you omit the file extension, SQL*Plus assumes the default command-file extension (normally SQL). For information on changing the default extension, see the SUFFIX variable of the SET command in this chapter.
If you specify a filename, SQL*Plus searches for the file in the directory set by ORACLE_PATH. If SQL*Plus cannot find the file in ORACLE_PATH, or if ORACLE_PATH is not set, it searches for the file in the current working directory. If SQL*Plus cannot find the file in either directory, it creates a file with the specified name.
The substitution variable, _EDITOR, contains the name of the text editor invoked by EDIT. You can change the text editor by changing the value of _EDITOR. For information about changing the value of a substitution variable, see DEFINE. EDIT attempts to run the default operating system editor if _EDITOR is undefined.
EDIT places the contents of the SQL buffer in a file named AFIEDT.BUF by default (in your current working directory) and runs the text editor on the contents of the file. If the file AFIEDT.BUF already exists, it is overwritten with the contents of the buffer. You can change the default filename by using the SET EDITFILE command. For more information about setting a default filename for the EDIT command, see the EDITFILE variable of the SET command in this chapter.
|
Note: The default file, AFIEDT.BUF, may have a different name on some operating systems. |
If you do not specify a filename and the buffer is empty, EDIT returns an error message.
To leave the editing session and return to SQL*Plus, terminate the editing session in the way customary for the text editor. When you leave the editor, SQL*Plus loads the contents of the file into the buffer.
Examples
To edit the file REPORT with the extension SQL using your operating system text editor, enter
EDIT REPORT
Syntax
EXEC[UTE] statement
where statement represents a PL/SQL statement.
Executes a single PL/SQL statement. The EXECUTE command is often useful when you want to execute a PL/SQL statement that references a stored procedure. For more information on PL/SQL, see your PL/SQL User's Guide and Reference.
Usage
If your EXECUTE command cannot fit on one line because of the PL/SQL statement, use the SQL*Plus continuation character (a hyphen).
The length of the command and the PL/SQL statement cannot exceed the length defined by SET LINESIZE.
You can suppress printing of the message "PL/SQL procedure successfully completed" with SET FEEDBACK OFF.
Examples
If the variable :n has been defined with:
VARIABLE n NUMBER
The following EXECUTE command assigns a value to the bind variable n:
EXECUTE :n := 1
PL/SQL procedure successfully completed. |
For information on how to create a bind variable, see the VARIABLE command.
Syntax
{EXIT | QUIT} [SUCCESS | FAILURE | WARNING | n | variable | :BindVariable] [COMMIT | ROLLBACK]
Commits or rolls back all pending changes, logs out of Oracle Database, terminates SQL*Plus and returns control to the operating system.
In iSQL*Plus, commits or rolls back all pending changes, stops processing the current iSQL*Plus script and returns focus to the Input area. There is no way to access the return code in iSQL*Plus. In iSQL*Plus click the Logout button to exit the Oracle Database.
Commit on exit, or commit on termination of processing in iSQL*Plus, is performed regardless of the status of SET AUTOCOMMIT.
Terms
{EXIT | QUIT}
Can be used interchangeably (QUIT is a synonym for EXIT).
SUCCESS
Exits normally.
FAILURE
Exits with a return code indicating failure.
WARNING
Exits with a return code indicating warning.
COMMIT
Saves pending changes to the database before exiting.
n
Represents an integer you specify as the return code.
variable
Represents a user-defined or system variable (but not a bind variable), such as SQL.SQLCODE. EXIT variable exits with the value of variable as the return code.
:BindVariable
Represents a variable created in SQL*Plus with the VARIABLE command, and then referenced in PL/SQL, or other subprograms. :BindVariable exits the subprogram and returns you to SQL*Plus.
ROLLBACK
Executes a ROLLBACK statement and abandons pending changes to the database before exiting.
EXIT with no clauses commits and exits with a value of SUCCESS.
Usage
EXIT enables you to specify an operating system return code. This enables you to run SQL*Plus scripts in batch mode and to detect programmatically the occurrence of an unexpected event. The manner of detection is operating-system specific.
The key words SUCCESS, WARNING, and FAILURE represent operating-system dependent values. On some systems, WARNING and FAILURE may be indistinguishable.
The range of operating system return codes is also restricted on some operating systems. This limits the portability of EXIT n and EXIT variable between platforms. For example, on UNIX there is only one byte of storage for return codes; therefore, the range for return codes is limited to zero to 255.
If you make a syntax error in the EXIT options or use a non-numeric variable, SQL*Plus performs an EXIT FAILURE COMMIT.
For information on exiting conditionally, see the WHENEVER SQLERROR and WHENEVER OSERROR commands.
Examples
The following example commits all uncommitted transactions and returns the error code of the last executed SQL command or PL/SQL block:
EXIT SQL.SQLCODE
GET is not available in iSQL*Plus. In iSQL*Plus use Load Script.
Syntax
GET [FILE] file_name[.ext] [LIS[T] | NOL[IST]]
Loads an operating system file into the SQL buffer.
In iSQL*Plus click the Load Script button to load a script into the Input area.
The buffer has no command history list and does not record SQL*Plus commands.
Terms
FILE
Keyword to specify that the following argument is the name of the script you want to load. This optional keyword is usually omitted.
If you want to load a script with the name file, because it is a command keyword, you need to put the name file in single quotes.
file_name[.ext]
Represents the file you wish to load (typically a script).
LIS[T]
Lists the contents of the file after it is loaded. This is the default.
NOL[IST]
Examples
To load a file called YEARENDRPT with the extension SQL into the buffer, enter
GET YEARENDRPT
Syntax
HELP | ? [topic]
where topic represents a SQL*Plus help topic, for example, COLUMN.
Accesses the SQL*Plus command-line help system. Enter HELP INDEX or ? INDEX for a list of topics. You can view SQL*Plus resources at http://otn.oracle.com/tech/sql_plus/ and the Oracle Database Library at http://otn.oracle.com/documentation/.
In iSQL*Plus, click the Help icon to access the iSQL*Plus Online Help.
Enter HELP or ? without topic to get help on the help system.
Usage
You can only enter one topic after HELP. You can abbreviate the topic (for example, COL for COLUMN). However, if you enter only an abbreviated topic and the abbreviation is ambiguous, SQL*Plus displays help for all topics that match the abbreviation. For example, if you enter
HELP EX
SQL*Plus displays the syntax for the EXECUTE command followed by the syntax for the EXIT command.
If you get a response indicating that help is not available, consult your database administrator.
Examples
To see a list of SQL*Plus commands for which help is available, enter
HELP INDEX
or
? INDEX
To see a single column list of SQL*Plus commands for which help is available, enter
HELP TOPICS
HOST is not available in iSQL*Plus.
Syntax
HO[ST] [command]
where command represents an operating system command.
Executes an operating system command without leaving SQL*Plus.
Enter HOST without command to display an operating system prompt. You can then enter multiple operating system commands. For information on returning to SQL*Plus, refer to the platform-specific Oracle documentation provided for your operating system.
|
Note: Operating system commands entered from a SQL*Plus session using the HOST command do not affect the current SQL*Plus session. For example, setting an operating system environment variable only affects SQL*Plus sessions started subsequently.You can disable HOST. For more information about disabling HOST, see " SQL*Plus Security". |
Usage
In some operating systems, you can use a character in place of HOST such as "$" in Windows or "!" in UNIX, or you may not have access to the HOST command. See the platform-specific Oracle documentation provided for your operating system or ask your DBA for more information.
On some platforms, an _RC substitution variable may be created with a HOST return value that is operation system dependent. It is recommended that you do not use the _RC substitution variable in scripts as it is not portable.
SQL*Plus removes the SQLTERMINATOR (a semicolon by default) before the HOST command is issued. A workaround for this is to add another SQLTERMINATOR. See SET SQLT[ERMINATOR] {; | c | ON | OFF} for more information.
Examples
To execute a UNIX operating system command, ls *.sql, enter
HOST ls *.sql
To execute a Windows operating system command, dir *.sql, enter
HOST dir *.sql
INPUT is not available in iSQL*Plus.
Syntax
I[NPUT] [text]
where text represents the text you wish to add.
Adds one or more new lines of text after the current line in the buffer. The buffer has no command history list and does not record SQL*Plus commands.
To add a single line, enter the text of the line after the command INPUT, separating the text from the command with a space. To begin the line with one or more spaces, enter two or more spaces between INPUT and the first non-blank character of text.
To add several lines, enter INPUT with no text. INPUT prompts you for each line. To leave INPUT, enter a null (empty) line or a period.
Usage
If you enter a line number at the command prompt larger than the number of lines in the buffer, and follow the number with text, SQL*Plus adds the text in a new line at the end of the buffer. If you specify zero (0) for the line number and follow the zero with text, then SQL*Plus inserts the line at the beginning of the buffer (that line becomes line 1).
Examples
Assume the SQL buffer contains the following command:
SELECT LAST_NAME, DEPARTMENT_ID, SALARY, COMMISSION_PCT
FROM EMP_DETAILS_VIEW
To add an ORDER BY clause to the query, enter
LIST 2
2* FROM EMP_DETAILS_VIEW |
INPUT ORDER BY LAST_NAME
LIST 2 ensures that line 2 is the current line. INPUT adds a new line containing the ORDER BY clause after the current line. The SQL buffer now contains the following lines:
1 SELECT LAST_NAME, DEPARTMENT_ID, SALARY, COMMISSION_PCT 2 FROM EMP_DETAILS_VIEW 3* ORDER BY LAST_NAME |
To add a two-line WHERE clause, enter
LIST 2
2* FROM EMP_DETAILS_VIEW |
INPUT
  3  WHERE JOB_ID = 'SA_MAN'
  4  AND COMMISSION_PCT=.25
  5
INPUT prompts you for new lines until you enter an empty line or a period. The SQL buffer now contains the following lines:
SELECT LAST_NAME, DEPARTMENT_ID, SALARY, COMMISSION_PCT FROM EMP_DETAILS_VIEW WHERE JOB_ID = 'SA_MAN' AND COMMISSION_PCT = .25 ORDER BY LAST_NAME |
Syntax
L[IST] [n | n m | n * | n LAST | * | * n | * LAST | LAST]
Lists one or more lines of the SQL buffer.
The buffer has no command history list and does not record SQL*Plus commands. In SQL*Plus command-line you can also use ";" to list all the lines in the SQL buffer.
Terms
Enter LIST with no clauses, or ";" to list all lines. The last line listed becomes the new current line (marked by an asterisk).
Examples
To list the contents of the buffer, enter
LIST
or enter
;
1 SELECT LAST_NAME, DEPARTMENT_ID, JOB_ID 2 FROM EMP_DETAILS_VIEW 3 WHERE JOB_ID = 'SH_CLERK' 4* ORDER BY DEPARTMENT_ID |
The asterisk indicates that line 4 is the current line.
To list the second line only, enter
LIST 2
The second line is displayed:
2* FROM EMP_DETAILS_VIEW |
To list the current line (now line 2) to the last line, enter
LIST * LAST
You will then see this:
2 FROM EMP_DETAILS_VIEW 3 WHERE JOB_ID = 'SH_CLERK' 4* ORDER BY DEPARTMENT_ID |
Syntax
PASSW[ORD] [username]
where username specifies the user. If omitted, username defaults to the current user.
Enables you to change a password without echoing it on an input device. In iSQL*Plus, use the Password screen to change your password.
Usage
To change the password of another user, you must have been granted the appropriate privilege. See CONNECT for more information about changing your password.
Examples
If you want to change your current password, enter
PASSWORD Changing password for your_password Old password: your_password New password: new_password Retype new password: new_password Password changed |
If you are logged on as a DBA, and want to change the password for user johnw (currently identified by johnwpass) to johnwnewpass
PASSWORD johnw Changing password for johnw New password: johnwnewpass Retype new password: johnwnewpass Password changed |
Passwords are not echoed to the screen, they are shown here for your convenience.
Syntax
PAU[SE] [text]
where text represents the text you wish to display.
Displays the specified text then waits for the user to press RETURN.
In iSQL*Plus, displays the Next Page button which the user must click to continue.
Enter PAUSE followed by no text to display two empty lines.
Usage
Because PAUSE always waits for the user's response, it is best to use a message that tells the user explicitly to press [Return].
PAUSE reads input from the terminal (if a terminal is available) even when you have designated the source of the command input as a file.
See SET PAU[SE] {ON | OFF | text} for information on pausing between pages of a report.
Examples
To print "Adjust paper and press RETURN to continue." and to have SQL*Plus wait for the user to press [Return], you might include the following PAUSE command in a script:
SET PAUSE OFF
PAUSE Adjust paper and press RETURN to continue.
SELECT ...
Syntax
PRI[NT] [variable ...]
where variable ... represents names of bind variables whose values you want to display.
Displays the current values of bind variables. For more information on bind variables, see your PL/SQL User's Guide and Reference.
Enter PRINT with no variables to print all bind variables.
Usage
Bind variables are created using the VARIABLE command. See VARIABLE for more information and examples.
You can control the formatting of the PRINT output just as you would query output. For more information, see the formatting techniques described in " Formatting SQL*Plus Reports".
To automatically display bind variables referenced in a successful PL/SQL block or used in an EXECUTE command, use the AUTOPRINT clause of the SET command. See SET for more information.
Examples
The following example illustrates a PRINT command:
VARIABLE n NUMBER
BEGIN
:n := 1;
END;
/
PL/SQL procedure successfully completed. |
PRINT n
N ---------- 1 |
Syntax
PRO[MPT] [text]
where text represents the text of the message you want to display.
Sends the specified message or a blank line to the user's screen. If you omit text, PROMPT displays a blank line on the user's screen.
Usage
You can use this command in scripts to give information to the user.
Examples
The following example shows the use of PROMPT in conjunction with ACCEPT in a script called ASKFORDEPT.SQL. ASKFORDEPT.SQL contains the following SQL*Plus and SQL commands:
PROMPTPROMPT Please enter a valid departmentPROMPT For example: 10SELECT DEPARTMENT_NAME FROM EMP_DETAILS_VIEWWHERE DEPARTMENT_ID = &NEWDEPT
Assume you run the file using START or @:
@ASKFORDEPT.SQL VAL1
@HTTP://machine_name.domain:port/ASKFORDEPT.SQL VAL1
Please enter a valid department For example: 10 Department ID?> |
You can enter a department number at the prompt Department ID?>. By default, SQL*Plus lists the line containing &NEWDEPT before and after substitution, and then displays the department name corresponding to the number entered at the Department ID?> prompt. You can use SET VERIFY OFF to prevent this behavior.
Syntax
RECOVER {general | managed | BEGIN BACKUP | END BACKUP}
where the general clause has the following syntax:
[AUTOMATIC] [FROM location]
{ {full_database_recovery | partial_database_recovery | LOGFILE filename}
[ {TEST | ALLOW integer CORRUPTION | parallel_clause } [TEST | ALLOW integer CORRUPTION | parallel_clause ]...]
| CONTINUE [DEFAULT] | CANCEL}
where the full_database_recovery clause has the following syntax:
[STANDBY] DATABASE
[ {UNTIL {CANCEL | TIME date | CHANGE integer} | USING BACKUP CONTROLFILE}
[UNTIL {CANCEL | TIME date | CHANGE integer} | USING BACKUP CONTROLFILE]...]
where the partial_database_recovery clause has the following syntax:
{TABLESPACE tablespace [, tablespace]...
| DATAFILE {filename | filenumber} [, filename | filenumber]...
| STANDBY {TABLESPACE tablespace [, tablespace]...
| DATAFILE {filename | filenumber} [, filename | filenumber]...}
UNTIL [CONSISTENT WITH] CONTROLFILE }
where the parallel clause has the following syntax:
{ NOPARALLEL | PARALLEL [ integer ] }
where the managed clause has the following syntax:
MANAGED STANDBY DATABASE recover_clause | cancel_clause | finish_clause
where the recover_clause has the following syntax:
{ { DISCONNECT [ FROM SESSION ] | { TIMEOUT integer | NOTIMEOUT } }
| { NODELAY | DEFAULT DELAY | DELAY integer } | NEXT integer
| { EXPIRE integer | NO EXPIRE } | parallel_clause
| USING CURRENT LOGFILE | UNTIL CHANGE integer
| THROUGH { [ THREAD integer ] SEQUENCE integer
| ALL ARCHIVELOG | { ALL | LAST | NEXT } SWITCHOVER} }
[ DISCONNECT [ FROM SESSION ] | { TIMEOUT integer | NOTIMEOUT }
| { NODELAY | DEFAULT DELAY | DELAY integer } | NEXT integer
| { EXPIRE integer | NO EXPIRE } | parallel_clause
| USING CURRENT LOGFILE | UNTIL CHANGE integer
| THROUGH { [ THREAD integer ] SEQUENCE integer
| ALL ARCHIVELOG | { ALL | LAST | NEXT } SWITCHOVER} ] ...
where the cancel_clause has the following syntax:
CANCEL [IMMEDIATE] [WAIT | NOWAIT]
where the finish_clause has the following syntax:
[ DISCONNECT [ FROM SESSION ] ] [ parallel_clause ]
FINISH [ SKIP [ STANDBY LOGFILE ] ] [ WAIT | NOWAIT ]
where the parallel_clause has the following syntax:
{ NOPARALLEL | PARALLEL [ integer ] }
Performs media recovery on one or more tablespaces, one or more datafiles, or the entire database. For more information on the RECOVER command, see the Oracle Database Administrator's Guide, the ALTER DATABASE RECOVER command in the Oracle Database SQL Reference, and the Oracle Database Backup and Recovery Basics guide.
Because of possible network timeouts, it is recommended that you use SQL*Plus command-line, not iSQL*Plus, for long running DBA operations such as RECOVER.
Terms
Automatically generates the name of the next archived redo log file needed to continue the recovery operation. Oracle Database uses the LOG_ARCHIVE_DEST (or LOG_ARCHIVE_DEST_ 1) and LOG_ARCHIVE_FORMAT parameters (or their defaults) to generate the target redo log filename. If the file is found, the redo contained in that file is applied. If the file is not found, SQL*Plus prompts you for a filename, displaying a generated filename as a suggestion.
If you do not specify either AUTOMATIC or LOGFILE, SQL*Plus prompts you for a filename, suggesting the generated filename. You can either accept the generated filename or replace it with a fully qualified filename. You can save time by using the LOGFILE clause to specify the filename if you know the archived filename differs from the filename Oracle Database would generate.
Specifies the location from which the archived redo log file group is read. The value of location must be a fully specified file location. If you omit this parameter, SQL*Plus assumes the archived redo log file group is in the location specified by the initialization parameter LOG_ARCHIVE_DEST or LOG_ARCHIVE_DEST_1. Do not specify FROM if you have set a file with SET LOGSOURCE.
full_database_recovery
Enables you to specify the recovery of a full database.
partial_database_recovery
Enables you to specify the recovery of individual tablespaces and datafiles.
Continues media recovery by applying the specified redo log file. In interactive recovery mode (AUTORECOVERY OFF), if a bad log name is entered, errors for the bad log name are displayed and you are prompted to enter a new log name.
TEST
Specifies a trial recovery to detect possible problems. Redo is applied normally, but no changes are written to disk, and changes are rolled back at the end of the trial recovery. You can only use the TEST clause for a trial recovery if you have restored a backup. In the event of logfile corruption, specifies the number of corrupt blocks that can be tolerated while allowing recovery to proceed. During normal recovery, integer cannot exceed 1.
ALLOW integer CORRUPTION
In the event of logfile corruption, specifies the number of corrupt blocks that can be tolerated while allowing recovery to proceed. During normal recovery, integer cannot exceed 1.
parallel _clause
Enables you to specify the degree of parallel processing to use during the recovery operation.
Continues multi-instance recovery after it has been interrupted to disable a thread.
CONTINUE DEFAULT
Continues recovery using the redo log file generated automatically by Oracle Database if no other logfile is specified. This is equivalent to specifying AUTOMATIC, except that Oracle Database does not prompt for a filename.
Terminates cancel-based recovery.
Recovers the standby database using the control file and archived redo log files copied from the primary database. The standby database must be mounted but not open.
Recovers the entire database.
Specifies an incomplete, cancel-based recovery. Recovery proceeds by prompting you with suggested filenames of archived redo log files, and recovery completes when you specify CANCEL instead of a filename.
Specifies an incomplete, time-based recovery. Use single quotes, and the following format:
'YYYY-MM-DD:HH24:MI:SS'
Specifies an incomplete, change-based recovery. integer is the number of the System Change Number (SCN) following the last change you wish to recover. For example, if you want to restore your database up to the transaction with an SCN of 9, you would specify UNTIL CHANGE 10.
Specifies that a backup of the control file be used instead of the current control file.
Recovers a particular tablespace. tablespace is the name of a tablespace in the current database. You may recover up to 16 tablespaces in one statement.
Recovers a particular datafile. You can specify any number of datafiles.
Reconstructs a lost or damaged tablespace in the standby database using archived redo log files copied from the primary database and a control file.
Reconstructs a lost or damaged datafile in the standby database using archived redo log files copied from the primary database and a control file.
UNTIL CONSISTENT WITH CONTROLFILE
Specifies that the recovery of an old standby datafile or tablespace uses the current standby database control file.
PARALLEL [integer]
SQL*Plus selects a degree of parallelism equal to the number of CPUs available on all participating instances times the value of the PARALLEL_THREADS_PER_CPU initialization parameter.
The PARALLEL keyword overrides the RECOVERY_PARALLELISM initialization parameter. For more information about the PARALLEL keyword see the Oracle Real Application Clusters Quick Start guide.
Use integer to specify the degree of parallelism, which is the number of parallel threads used in the parallel operation. Each parallel thread may use one or two parallel execution processes.
Specifies serial recovery processing. This is the default.
MANAGED STANDBY DATABASE
Specifies sustained standby recovery mode. This mode assumes that the standby database is an active component of an overall standby database architecture. A primary database actively archives its redo log files to the standby site. As these archived redo logs arrive at the standby site, they become available for use by a managed standby recovery operation. Sustained standby recovery is restricted to media recovery.
For more information on the parameters of this clause, see the Oracle Database Backup and Recovery Advanced User's Guide.
DISCONNECT
Indicates that the managed redo process (MRP) should apply archived redo files as a detached background process. Doing so leaves the current session available.
TIMEOUT
Specifies in minutes the wait period of the sustained recovery operation. The recovery process waits for integer minutes for a requested archived log redo to be available for writing to the standby database. If the redo log file does not become available within that time, the recovery process terminates with an error message. You can then issue the statement again to return to sustained standby recovery mode.
If you do not specify this clause, or if you specify NOTIMEOUT, the database remains in sustained standby recovery mode until you reissue the statement with the RECOVER CANCEL clause or until instance shutdown or failure.
NODELAY
Applies a delayed archivelog immediately to the standby database overriding any DELAY setting in the LOG_ARCHIVE_DEST_n parameter on the primary database. If you omit this clause, application of the archivelog is delayed according to the parameter setting. If DELAY was not specified in the parameter, the archivelog is applied immediately.
DEFAULT DELAY
Waits the default number of minutes specified in the LOG_ARCHIVE_DEST_n initialization parameter before applying the archived redo logs.
DELAY integer
Waits integer minutes before applying the archived redo logs.
NEXT integer
Applies the specified number of archived redo logs as soon as possible after they have been archived. It temporarily overrides any DELAY setting in the LOG_ARCHIVE_DEST_n parameter on the primary database, and any delay values set in an earlier SQL*Plus RECOVER command or an ALTER DATABASE RECOVER command.
EXPIRE integer
Specifies the number of minutes from the current time after which managed recovery terminates automatically.
NO EXPIRE
Disables a previously specified EXPIRE integer option.
USING CURRENT LOGFILE
Recovers redo from standby online logs as they are being filled, without requiring them to be archived in the standby database first.
UNTIL CHANGE integer
Processes managed recovery up to but not including the specified system change number (SCN).
THROUGH THREAD integer SEQUENCE integer
Terminates managed recovery based on archivelog thread number and sequence number. Managed recovery terminates when the corresponding archivelog has been applied. If omitted, THREAD defaults to 1.
THROUGH ALL ARCHIVELOG
Continues managed standby until all archivelogs have been recovered. You can use this statement to override a THROUGH THREAD integer SEQUENCE integer clause issued in an earlier statement. If the THROUGH clause is omitted, this is the default.
THROUGH ALL SWITCHOVER
Keeps managed standby recovery running through all switchover operations.
THROUGH LAST SWITCHOVER
Terminates managed standby recovery after the final end-of-redo archival indicator.
THROUGH NEXT SWITCHOVER
Terminates managed standby recovery after recovering the next end-of-redo archival indicator.
Terminates managed standby recovery after applying the current archived redo file. Session control returns when the recovery process terminates.
CANCEL IMMEDIATE
Terminates managed standby recovery after applying the current archived redo file, or after the next redo log file read, whichever comes first. Session control returns when the recovery process terminates.
CANCEL IMMEDIATE WAIT
Terminates managed standby recovery after applying the current archived redo file or after the next redo log file read, whichever comes first. Session control returns when the managed standby recovery terminates.
CANCEL IMMEDIATE cannot be issued from the same session that issued the RECOVER MANAGED STANDBY DATABASE statement.
CANCEL IMMEDIATE NOWAIT
Terminates managed standby recovery after applying the current archived redo file, or after the next redo log file read, whichever comes first. Session control returns immediately.
CANCEL NOWAIT
Terminates managed standby recovery after the next redo log file read and returns session control immediately.
FINISH
Recovers the current standby online logfiles of the standby database. This clause may be useful if the primary database fails. It overrides any delays specified for archivelogs, so that logs are applied immediately.
FINISH cannot be issued if you have also specified TIMEOUT, DELAY, EXPIRE or NEXT clauses.
Usage
You must have the OSDBA role enabled. You cannot use the RECOVER command when connected through the multi-threaded server.
To perform media recovery on an entire database (all tablespaces), the database must be mounted and closed, and all tablespaces requiring recovery must be online.
To perform media recovery on a tablespace, the database must be mounted and open, and the tablespace must be offline.
To perform media recovery on a datafile, the database can remain open and mounted with the damaged datafiles offline (unless the file is part of the SYSTEM tablespace).
Before using the RECOVER command you must have restored copies of the damaged datafiles from a previous backup. Be sure you can access all archived and online redo log files dating back to when that backup was made.
When another log file is required during recovery, a prompt suggests the names of files that are needed. The name is derived from the values specified in the initialization parameters LOG_ARCHIVE_DEST and LOG_ARCHIVE_FORMAT. You should restore copies of the archived redo log files needed for recovery to the destination specified in LOG_ARCHIVE_DEST, if necessary. You can override the initialization parameters by setting the LOGSOURCE variable with the SET LOGSOURCE command.
During recovery you can accept the suggested log name by pressing return, cancel recovery by entering CANCEL instead of a log name, or enter AUTO at the prompt for automatic file selection without further prompting.
If you have enabled autorecovery (that is, SET AUTORECOVERY ON), recovery proceeds without prompting you with filenames. Status messages are displayed when each log file is applied. When normal media recovery is done, a completion status is returned.
Examples
To recover the entire database, enter
RECOVER DATABASE
To recover the database until a specified time, enter
RECOVER DATABASE UNTIL TIME 01-JAN-2001:04:32:00
To recover the two tablespaces ts_one and ts_two from the database, enter
RECOVER TABLESPACE ts_one, ts_two
To recover the datafile data1.db from the database, enter
RECOVER DATAFILE 'data1.db'
Syntax
REM[ARK]
Begins a comment in a script. SQL*Plus does not interpret the comment as a command.
Usage
The REMARK command must appear at the beginning of a line, and the comment ends at the end of the line. A line cannot contain both a comment and a command.
A "–" at the end of a REMARK line is treated as a line continuation character.
For details on entering comments in scripts using the SQL comment delimiters, /* ... */, or the ANSI/ISO comment delimiter, - -, see "Placing Comments in Scripts".
Examples
The following script contains some typical comments:
REM COMPUTE uses BREAK ON REPORT to break on end of table
BREAK ON REPORT
COMPUTE SUM OF "DEPARTMENT 10" "DEPARTMENT 20" -
"DEPARTMENT 30" "TOTAL BY JOB_ID" ON REPORT
REM Each column displays the sums of salaries by job for
REM one of the departments 10, 20, 30.
SELECT JOB_ID,
SUM(DECODE( DEPARTMENT_ID, 10, SALARY, 0)) "DEPARTMENT 10",
SUM(DECODE( DEPARTMENT_ID, 20, SALARY, 0)) "DEPARTMENT 20",
SUM(DECODE( DEPARTMENT_ID, 30, SALARY, 0)) "DEPARTMENT 30",
SUM(SALARY) "TOTAL BY JOB_ID"
FROM EMP_DETAILS_VIEW
GROUP BY JOB_ID;
Syntax
REPF[OOTER] [PAGE] [printspec [text | variable] ...] | [ON | OFF]
where printspec represents one or more of the following clauses used to place and format the text:
COL n
S[KIP] [n]
TAB n
LE[FT]
CE[NTER]
R[IGHT]
BOLD
FORMAT text
Places and formats a specified report footer at the bottom of each report, or lists the current REPFOOTER definition.
Enter REPFOOTER with no clauses to list the current REPFOOTER definition.
Terms
See the REPHEADER command for additional information on terms and clauses in the REPFOOTER command syntax.
Usage
If you do not enter a printspec clause before the text or variables, REPFOOTER left justifies the text or variables.
You can use any number of constants and variables in a printspec. SQL*Plus displays the constants and variables in the order you specify them, positioning and formatting each constant or variable as specified by the printspec clauses that precede it.
|
Note: If SET EMBEDDED is ON, the report footer is suppressed. |
Examples
To define "END EMPLOYEE LISTING REPORT" as a report footer on a separate page and to center it, enter:
REPFOOTER PAGE CENTER 'END EMPLOYEE LISTING REPORT'
TTITLE RIGHT 'Page: ' FORMAT 999 SQL.PNO
SELECT LAST_NAME, SALARY
FROM EMP_DETAILS_VIEW
WHERE SALARY > 12000;
LAST_NAME                     SALARY
------------------------- ----------
King                           24000
Kochhar                        17000
De Haan                        17000
Russell                        14000
Partners                       13500
Hartstein                      13000
                          ----------
sum                            98500

                                                                      Page:  2
                           END EMPLOYEE LISTING REPORT

6 rows selected.
|
To suppress the report footer without changing its definition, enter
REPFOOTER OFF
Syntax
REPH[EADER] [PAGE] [printspec [text | variable] ...] | [ON | OFF]
where printspec represents one or more of the following clauses used to place and format the text:
COL n
S[KIP] [n]
TAB n
LE[FT]
CE[NTER]
R[IGHT]
BOLD
FORMAT text
Places and formats a specified report header at the top of each report, or lists the current REPHEADER definition.
Enter REPHEADER with no clauses to list the current REPHEADER definition.
Terms
These terms and clauses also apply to the REPFOOTER command.
PAGE
Begins a new page after printing the specified report header or before printing the specified report footer.
text
The report header or footer text. Enter text in single quotes if you want to place more than one word on a single line. The default is NULL.
variable
A substitution variable or any of the following system-maintained values. SQL.LNO is the current line number, SQL.PNO is the current page number, SQL.CODE is the current error code, SQL.RELEASE is the current Oracle Database release number, and SQL.USER is the current username.
To print one of these values, reference the appropriate variable in the report header or footer. You can use the FORMAT clause to format variable.
OFF
Turns the report header or footer off (suppresses its display) without affecting its definition.
COL n
Indents to column n of the current line (backward if column n has been passed). Column in this context means print position, not table column.
S[KIP] [n]
Skips to the start of a new line n times; if you omit n, one time; if you enter zero for n, backward to the start of the current line.
TAB n
Skips forward n columns (backward if you enter a negative value for n). Column in this context means print position, not table column.
LE[FT] CE[NTER] R[IGHT]
Left-align, center, and right-align data on the current line respectively. SQL*Plus aligns following data items as a group, up to the end of the printspec or the next LEFT, CENTER, RIGHT, or COL command. CENTER and RIGHT use the SET LINESIZE value to calculate the position of the data item that follows.
BOLD
Prints data in bold print. SQL*Plus represents bold print on your terminal by repeating the data on three consecutive lines. On some operating systems, SQL*Plus may instruct your printer to print bold text on three consecutive lines, instead of bold.
FORMAT text
Specifies a format model that determines the format of data items up to the next FORMAT clause or the end of the command. The format model must be a text constant such as A10 or $999. See COLUMN for more information on formatting and valid format models.
If the datatype of the format model does not match the datatype of a given data item, the FORMAT clause has no effect on that item.
If no appropriate FORMAT model precedes a given data item, SQL*Plus prints NUMBER values according to the format specified by SET NUMFORMAT or, if you have not used SET NUMFORMAT, the default format. SQL*Plus prints DATE values using the default format.
Usage
If you do not enter a printspec clause before the text or variables, REPHEADER left justifies the text or variables.
You can use any number of constants and variables in a printspec. SQL*Plus displays the constants and variables in the order you specify, positioning and formatting each constant or variable as specified by the printspec clauses that precede it.
Examples
To define "EMPLOYEE LISTING REPORT" as a report header on a separate page, and to center it, enter:
REPHEADER PAGE CENTER 'EMPLOYEE LISTING REPORT'
TTITLE RIGHT 'Page: ' FORMAT 999 SQL.PNO
SELECT LAST_NAME, SALARY
FROM EMP_DETAILS_VIEW
WHERE SALARY > 12000;
Page:   1
                             EMPLOYEE LISTING REPORT
                                                                 Page:   2
LAST_NAME                     SALARY
------------------------- ----------
King                           24000
Kochhar                        17000
De Haan                        17000
Russell                        14000
Partners                       13500
Hartstein                      13000
                          ----------
sum                            98500

6 rows selected.
|
To suppress the report header without changing its definition, enter:
REPHEADER OFF
Syntax
R[UN]
Lists and executes the SQL command or PL/SQL block currently stored in the SQL buffer.
The buffer has no command history list and does not record SQL*Plus commands.
Usage
RUN causes the last line of the SQL buffer to become the current line.
The slash command (/) functions similarly to RUN, but does not list the command in the SQL buffer on your screen. The SQL buffer always contains the last SQL statement or PL/SQL block entered.
Examples
Assume the SQL buffer contains the following script:
SELECT DEPARTMENT_ID
FROM EMP_DETAILS_VIEW
WHERE SALARY>12000
To RUN the script, enter
RUN
1  SELECT DEPARTMENT_ID
  2  FROM EMP_DETAILS_VIEW
  3 WHERE SALARY>12000

DEPARTMENT_ID
-------------
           90
           90
           90
           80
           80
           20

6 rows selected.
|
SAVE is not available in iSQL*Plus. In iSQL*Plus use Save Script.
Syntax
SAV[E] [FILE] file_name[.ext] [CRE[ATE] | REP[LACE] | APP[END]]
Saves the contents of the SQL buffer in an operating system script. In iSQL*Plus, click the Save Script button to save the Input area contents to a script.
The buffer has no command history list and does not record SQL*Plus commands.
Terms
FILE
Keyword to specify that the following argument is the name you want to give to the saved script. This optional keyword is usually omitted.
If you want to save the script with the name file, because it is a command keyword, you need to put the name file in single quotes.
file_name[.ext]
Specifies the script in which you wish to save the buffer's contents.
CREATE
Creates a new file with the name specified. This is the default behavior.
REP[LACE]
Replaces the contents of an existing file. If the file does not exist, REPLACE creates the file.
APP[END]
Adds the contents of the buffer to the end of the file you specify.
Usage
If you do not specify an extension, SQL*Plus assumes the default command-file extension (normally SQL). See SET SUF[FIX] {SQL | text} for information on changing this default extension.
If you wish to SAVE a file under a name identical to a SAVE command clause (CREATE, REPLACE, or APPEND), you must specify a file extension.
When you SAVE the contents of the SQL buffer, SAVE adds a line containing a slash (/) to the end of the file.
Examples
To save the contents of the buffer in a file named DEPTSALRPT with the extension SQL, enter
SAVE DEPTSALRPT
To save the contents of the buffer in a file named DEPTSALRPT with the extension OLD, enter
SAVE DEPTSALRPT.OLD
Sets a system variable to alter the SQL*Plus environment settings for your current session, for example, to:
customize HTML formatting
enable or disable the printing of column headings
set the number of lines per page
set the display width for data
You also use the Preferences screens in iSQL*Plus to set system variables.
Syntax
SET system_variable value
where system_variable and value represent one of the clauses shown in the "SET System Variable Summary" table following.
Usage
SQL*Plus maintains system variables (also called SET command variables) to enable you to set up a particular environment for a SQL*Plus session. You can change these system variables with the SET command and list them with the SHOW command.
SET ROLE and SET TRANSACTION are SQL commands (see the Oracle Database SQL Reference for more information). When not followed by the keywords TRANSACTION or ROLE, SET is assumed to be a SQL*Plus command.
| System Variable | Description |
|---|---|
|
SET APPI[NFO]{ON | OFF | text} |
Sets automatic registering of scripts through the DBMS_APPLICATION_INFO package. |
|
|
Sets the number of rows, called a batch, that SQL*Plus will fetch from the database at one time. |
|
SET AUTO[COMMIT]{ON | OFF | IMM[EDIATE] | n} |
Controls when Oracle Database commits pending changes to the database. |
|
|
Sets the automatic printing of bind variables. |
|
|
ON sets the RECOVER command to automatically apply the default filenames of archived redo log files needed during recovery. |
|
SET AUTOT[RACE] {ON | OFF | TRACE[ONLY]} [EXP[LAIN]] [STAT[ISTICS]] |
|
|
SET BLO[CKTERMINATOR] {. | c | ON | OFF} |
Sets the non-alphanumeric character used to end PL/SQL blocks to c. |
|
SET CMDS[EP] {; | c | ON | OFF} |
Sets the non-alphanumeric character used to separate multiple SQL*Plus commands entered on one line to c. |
|
|
In iSQL*Plus, SET COLSEP determines the column separator character to be printed between column output that is rendered inside <PRE> tags. |
|
SET COM[PATIBILITY]{V7 | V8 | NATIVE} |
Specifies the version of Oracle Database to which you are currently connected. |
|
SET CON[CAT] {. | c | ON | OFF} |
Sets the character you can use to terminate a substitution variable reference if you wish to immediately follow the variable with a character that SQL*Plus would otherwise interpret as a part of the substitution variable name. |
|
|
Controls the number of batches after which the COPY command commits changes to the database. |
|
|
Sets the suppression of the comparison of datatypes while inserting or appending to tables with the COPY command. |
|
SET DEF[INE] {& | c | ON | OFF} |
Sets the character used to prefix variables to c. |
|
SET DESCRIBE [DEPTH {1 | n | ALL}] [LINENUM {ON | OFF}] [INDENT {ON | OFF}] |
Sets the depth of the level to which you can recursively describe an object. |
|
|
Controls whether the START command lists each command in a script as the command is executed. |
|
*SET EDITF[ILE] file_name[.ext] |
Sets the default filename for the EDIT command. |
|
|
Controls where on a page each report begins. |
|
SET ESC[APE] {\ | c | ON | OFF} |
Defines the character you enter as the escape character. |
|
SET FEED[BACK] {6 | n | ON | OFF} |
Displays the number of records returned by a query when a query selects at least n records. |
|
SET FLAGGER {OFF | ENTRY | INTERMED[IATE] | FULL} |
Checks to make sure that SQL statements conform to the ANSI/ISO SQL92 standard. |
|
|
Controls when output is sent to the user's display device. |
|
|
Controls printing of column headings in reports. |
|
SET HEADS[EP] { | | c | ON | OFF} |
Defines the character you enter as the heading separator character. |
|
SET INSTANCE [instance_path | LOCAL] |
Changes the default instance for your session to the specified instance path. |
|
SET LIN[ESIZE] {80 | n} |
Sets the total number of characters that SQL*Plus displays on one line before beginning a new line. |
|
|
Sets the starting position from which CLOB and NCLOB data is retrieved and displayed. |
|
|
Specifies the location from which archive logs are retrieved during recovery. |
|
|
Sets maximum width (in bytes) for displaying LONG, CLOB, NCLOB and XMLType values; and for copying LONG values. |
|
|
Sets the size (in bytes) of the increments in which SQL*Plus retrieves a LONG, CLOB, NCLOB or XMLType value. |
|
|
Outputs HTML marked up text, which is the output used by iSQL*Plus. |
|
|
Sets the number of blank lines to be printed from the top of each page to the top title. |
|
|
Sets the text that represents a null value in the result of a SQL SELECT command. |
|
|
Sets the default format for displaying numbers. |
|
|
Sets the default width for displaying numbers. |
|
|
Sets the number of lines in each page. |
|
|
Enables you to control scrolling of your terminal when running reports. |
|
SET RECSEP {WR[APPED] | EA[CH] | OFF} |
RECSEP tells SQL*Plus where to make the record separation. |
|
|
Display or print record separators. |
|
SET SERVEROUT[PUT] {ON | OFF} [SIZE n] [FOR[MAT] {WRA[PPED] |
Controls whether to display the output (that is, DBMS_OUTPUT PUT_LINE) of stored procedures or PL/SQL blocks in SQL*Plus. |
|
*SET SHIFT[INOUT] {VIS[IBLE] | INV[ISIBLE]} |
Enables correct alignment for terminals that display shift characters. |
|
|
Controls whether SQL*Plus lists the old and new settings of a SQL*Plus system variable when you change the setting with SET. |
|
*SET SQLBL[ANKLINES] {ON | OFF} |
Controls whether SQL*Plus puts blank lines within a SQL command or script. |
|
SET SQLC[ASE] {MIX[ED] | LO[WER] | UP[PER]} |
Converts the case of SQL commands and PL/SQL blocks just prior to execution. |
|
|
Sets the character sequence SQL*Plus displays as a prompt after you continue a SQL*Plus command on an additional line using a hyphen (–). |
|
|
Sets the prompt for the second and subsequent lines of a SQL command or PL/SQL block. |
|
SET SQLPLUSCOMPAT[IBILITY] {x.y[.z]} |
Sets the behavior or output format of VARIABLE to that of the release or version specified by x.y[.z]. |
|
|
Sets the SQL*Plus prefix character. |
|
*SET SQLP[ROMPT] {SQL> | text} |
Sets the SQL*Plus command prompt. |
|
SET SQLT[ERMINATOR] {; | c | ON | OFF} |
Sets the character used to end and execute SQL commands to c. |
|
|
Sets the default file that SQL*Plus uses in commands that refer to scripts. |
|
|
Determines how SQL*Plus formats white space in terminal output. |
|
|
Controls the display of output generated by commands executed from a script. |
|
|
Controls the display of the current time. |
|
|
Controls the display of timing statistics. |
|
|
Determines whether SQL*Plus puts trailing blanks at the end of each displayed line. |
|
|
Determines whether SQL*Plus puts trailing blanks at the end of each spooled line. |
|
SET UND[ERLINE] {- | c | ON | OFF} |
Sets the character used to underline column headings in SQL*Plus reports to c. |
|
|
Controls whether SQL*Plus lists the text of a SQL statement or PL/SQL command before and after SQL*Plus replaces substitution variables with values. |
|
|
Controls whether SQL*Plus truncates the display of a SELECTed row if it is too long for the current line width. |
*SET command not available in iSQL*Plus.
Sets automatic registering of scripts through the DBMS_APPLICATION_INFO package.
This enables the performance and resource usage of each script to be monitored by your DBA. The registered name appears in the MODULE column of the V$SESSION and V$SQLAREA virtual tables. You can also read the registered name using the DBMS_APPLICATION_INFO.READ_MODULE procedure.
ON registers scripts invoked by the @, @@ or START commands. OFF disables registering of scripts. Instead, the current value of text is registered. text specifies the text to register when no script is being run or when APPINFO is OFF, which is the default. The default for text is "SQL*Plus". If you enter multiple words for text, you must enclose them in quotes. The maximum length for text is limited by the DBMS_APPLICATION_INFO package.
The registered name has the format nn@xfilename where: nn is the depth level of script; x is '<' when the script name is truncated, otherwise, it is blank; and filename is the script name, possibly truncated to the length allowed by the DBMS_APPLICATION_INFO package interface.
For more information on the DBMS_APPLICATION_INFO package, see the Oracle Database Performance Tuning Guide.
Example
To display the value of APPINFO, as it is SET OFF by default, enter
SET APPINFO ON
SHOW APPINFO
APPINFO is ON and set to "SQL*Plus" |
To change the default text, enter
SET APPINFO 'This is SQL*Plus'
To make sure that registration has taken place, enter
VARIABLE MOD VARCHAR2(50)
VARIABLE ACT VARCHAR2(40)
EXECUTE DBMS_APPLICATION_INFO.READ_MODULE(:MOD, :ACT);
PL/SQL procedure successfully completed. |
PRINT MOD
MOD --------------------------------------------------- This is SQL*Plus |
To change APPINFO back to its default setting, enter
SET APPINFO OFF
Sets the number of rows that SQL*Plus will fetch from the database at one time.
Valid values are 1 to 5000. A large value increases the efficiency of queries and subqueries that fetch many rows, but requires more memory. Values over approximately 100 provide little added performance. ARRAYSIZE has no effect on the results of SQL*Plus operations other than increasing efficiency.
Controls when Oracle Database commits pending changes to the database after SQL or PL/SQL commands.
ON commits pending changes to the database after Oracle Database executes each successful INSERT, UPDATE, or DELETE, or PL/SQL block. OFF suppresses automatic committing so that you must commit changes manually (for example, with the SQL command COMMIT). IMMEDIATE functions in the same manner as ON. n commits pending changes to the database after Oracle Database executes n successful SQL INSERT, UPDATE, or DELETE commands, or PL/SQL blocks. n cannot be less than zero or greater than 2,000,000,000. The statement counter is reset to zero after successful completion of n INSERT, UPDATE or DELETE commands or PL/SQL blocks, a commit, a rollback, or a SET AUTOCOMMIT command.
SET AUTOCOMMIT does not alter the commit behavior when SQL*Plus exits. Any uncommitted data is committed by default.
|
Note: For this feature, a PL/SQL block is considered one transaction, regardless of the actual number of SQL commands contained within it. |
Sets the automatic printing of bind variables.
ON or OFF controls whether SQL*Plus automatically displays bind variables (referenced in a successful PL/SQL block or used in an EXECUTE command).
See PRINT for more information about displaying bind variables.
ON sets the RECOVER command to automatically apply the default filenames of archived redo log files needed during recovery.
No interaction is needed, provided the necessary files are in the expected locations with the expected names. The filenames used are derived from the values of the initialization parameters LOG_ARCHIVE_DEST and LOG_ARCHIVE_FORMAT.
OFF, the default option, requires that you enter the filenames manually or accept the suggested default filename given. See RECOVER for more information about database recovery.
Example
To set the recovery mode to AUTOMATIC, enter
SET AUTORECOVERY ON
RECOVER DATABASE
Displays a report on the execution of successful SQL DML statements (SELECT, INSERT, UPDATE or DELETE).
The report can include execution statistics and the query execution path.
OFF does not display a trace report. ON displays a trace report. TRACEONLY displays a trace report, but does not print query data, if any. EXPLAIN shows the query execution path by performing an EXPLAIN PLAN. STATISTICS displays SQL statement statistics. Information about EXPLAIN PLAN is documented in the Oracle Database SQL Reference.
Using ON or TRACEONLY with no explicit options defaults to EXPLAIN STATISTICS.
The TRACEONLY option may be useful to suppress the query data of large queries. If STATISTICS is specified, SQL*Plus still fetches the query data from the server, however, the data is not displayed.
The AUTOTRACE report is printed after the statement has successfully completed.
Information about Execution Plans and the statistics is documented in the Oracle Database Performance Tuning Guide.
When SQL*Plus produces a STATISTICS report, a second connection to the database is automatically created. This connection is closed when the STATISTICS option is set to OFF, or you log out of SQL*Plus.
The formatting of your AUTOTRACE report may vary depending on the version of the server to which you are connected and the configuration of the server.
AUTOTRACE is not available when FIPS flagging is enabled.
See Tracing Statements for more information on AUTOTRACE.
Sets the character used to end PL/SQL blocks to c.
It cannot be an alphanumeric character or a whitespace. To execute the block, you must issue a RUN or / (slash) command.
OFF means that SQL*Plus recognizes no PL/SQL block terminator. ON changes the value of c back to the default period (.), not the most recently used character.
Sets the non-alphanumeric character used to separate multiple SQL*Plus commands entered on one line to c.
ON or OFF controls whether you can enter multiple commands on a line. ON automatically sets the command separator character to a semicolon (;).
Example
To specify a title with TTITLE and format a column with COLUMN, both on the same line, enter
SET CMDSEP +
TTITLE LEFT 'SALARIES' + COLUMN SALARY FORMAT $99,999
SELECT LAST_NAME, SALARY FROM EMP_DETAILS_VIEW
WHERE JOB_ID = 'SH_CLERK';
SALARIES LAST_NAME SALARY ------------------------- -------- Taylor $3,200 Fleaur $3,100 Sullivan $2,500 Geoni $2,800 Sarchand $4,200 Bull $4,100 Dellinger $3,400 Cabrio $3,000 Chung $3,800 Dilly $3,600 Gates $2,900 Perkins $2,500 Bell $4,000 Everett $3,900 McCain $3,200 Jones $2,800 SALARIES LAST_NAME SALARY ------------------------- -------- Walsh $3,100 Feeney $3,000 OConnell $2,600 Grant $2,600 20 rows selected. |
Sets the column separator character printed between columns in output.
If the COLSEP variable contains blanks or punctuation characters, you must enclose it with single quotes. The default value for text is a single space.
In multi-line rows, the column separator does not print between columns that begin on different lines. The column separator does not appear on blank lines produced by BREAK ... SKIP n and does not overwrite the record separator. See SET RECSEP {WR[APPED] | EA[CH] | OFF} for more information.
The Column Separator (SET COLSEP) is only used in iSQL*Plus when Preformatted Output is ON (SET MARKUP HTML PREFORMAT).
Example
To set the column separator to "|" enter
SET MARKUP HTML PREFORMAT ON
SET COLSEP '|'
SELECT LAST_NAME, JOB_ID, DEPARTMENT_ID
FROM EMP_DETAILS_VIEW
WHERE DEPARTMENT_ID = 20;
LAST_NAME |JOB_ID |DEPARTMENT_ID -------------------------|----------|------------- Hartstein |MK_MAN | 20 Fay |MK_REP | 20 |
Specifies the version of Oracle Database SQL syntax to use.
Set COMPATIBILITY to V7 for Oracle7, or to V8 for Oracle8 or later. COMPATIBILITY always defaults to NATIVE. Set COMPATIBILITY for the version of Oracle Database SQL syntax you want to use on the connected database, otherwise, you may be unable to run any SQL commands.
Example
To run a script, SALARY.SQL, created with Oracle7 SQL syntax, enter
SET COMPATIBILITY V7
START SALARY
After running the file, reset compatibility to NATIVE to run scripts created for Oracle Database 10g:
SET COMPATIBILITY NATIVE
Alternatively, you can add the command SET COMPATIBILITY V7 to the beginning of the script, and reset COMPATIBILITY to NATIVE at the end of the file.
Sets the character used to terminate a substitution variable reference when SQL*Plus would otherwise interpret the next character as a part of the variable name.
SQL*Plus resets the value of CONCAT to a period when you switch CONCAT on.
Controls the number of rows after which the COPY command commits changes to the database.
COPY commits rows to the destination database each time it copies n row batches. Valid values are zero to 5000. You can set the size of a batch with the ARRAYSIZE variable. If you set COPYCOMMIT to zero, COPY performs a commit only at the end of a copy operation.
Sets the suppression of the comparison of datatypes while inserting or appending to tables with the COPY command.
This is to facilitate copying to DB2, which requires that a CHAR be copied to a DB2 DATE.
Sets the character used to prefix substitution variables to c.
ON or OFF controls whether SQL*Plus will scan commands for substitution variables and replace them with their values. ON changes the value of c back to the default '&', not the most recently used character. The setting of DEFINE to OFF overrides the setting of the SCAN variable.
See SET SCAN {ON|OFF} (obsolete) for more information on the SCAN variable.
Sets the depth of the level to which you can recursively describe an object.
The valid range of the DEPTH clause is from 1 to 50. If you SET DESCRIBE DEPTH ALL, then the depth will be set to 50, which is the maximum level allowed. You can also display the line number and indentation of the attribute or column name when an object contains multiple object types. Use the SET LINESIZE command to control the width of the data displayed.
See DESCRIBE for more information about describing objects.
Example
To create an object type ADDRESS, enter
CREATE TYPE ADDRESS AS OBJECT
  ( STREET  VARCHAR2(20),
    CITY    VARCHAR2(20)
  );
/
Type created |
To create the table EMPLOYEE that contains a nested object, EMPADDR, of type ADDRESS, enter
CREATE TABLE EMPLOYEE
  (LAST_NAME VARCHAR2(30),
   EMPADDR ADDRESS,
   JOB_ID VARCHAR2(20),
   SALARY NUMBER(7,2)
  );
/
Table created |
To describe the table EMPLOYEE to a depth of two levels, and to indent the output and display line numbers, enter:
SET DESCRIBE DEPTH 2 LINENUM ON INDENT ON
DESCRIBE employee
Name                            Null?    Type
       ------------------------------- -------- --------------------------
1      LAST_NAME                                VARCHAR2(30)
2      EMPADDR                                  ADDRESS
3    2   STREET                                 VARCHAR2(20)
4    2   CITY                                   VARCHAR2(20)
5      JOB_ID                                   VARCHAR2(20)
6      SALARY                                   NUMBER(7,2)
|
Controls whether or not to echo commands in a script that is executed with @, @@ or START. ON displays the commands on screen. OFF suppresses the display. ECHO does not affect the display of commands you enter interactively or redirect to SQL*Plus from the operating system.
SET EDITFILE is not supported in iSQL*Plus
Sets the default filename for the EDIT command. See EDIT for more information about the EDIT command. The default filename for the EDIT command is afiedt.buf which is the SQL buffer. The buffer has no command history list and does not record SQL*Plus commands.
You can include a path and/or file extension. See SET SUF[FIX] {SQL | text} for information on changing the default extension. The default filename and maximum filename length are operating system specific.
Controls where on a page each report begins.
OFF forces each report to start at the top of a new page. ON enables a report to begin anywhere on a page. Set EMBEDDED to ON when you want a report to begin printing immediately following the end of the previously run report.
Defines the character used as the escape character.
OFF undefines the escape character. ON enables the escape character. ON changes the value of c back to the default "\".
You can use the escape character before the substitution character (set through SET DEFINE) to indicate that SQL*Plus should treat the substitution character as an ordinary character rather than as a request for variable substitution.
Example
If you define the escape character as an exclamation point (!), then
SET ESCAPE !
ACCEPT v1 PROMPT 'Enter !&1:'
displays this prompt:
Enter &1: |
To set the escape character back to the default value of \ (backslash), enter
SET ESCAPE ON
Displays the number of records returned by a script when a script selects at least n records.
ON or OFF turns this display on or off. Turning feedback ON sets n to 1. Setting feedback to zero is equivalent to turning it OFF.
SET FEEDBACK OFF also turns off the statement confirmation messages such as 'Table created' and 'PL/SQL procedure successfully completed' that are displayed after successful SQL or PL/SQL statements.
Checks to make sure that SQL statements conform to the ANSI/ISO SQL92 standard.
If any non-standard constructs are found, the Oracle Database Server flags them as errors and displays the violating syntax. This is the equivalent of the SQL language ALTER SESSION SET FLAGGER command.
You may execute SET FLAGGER even if you are not connected to a database. FIPS flagging will remain in effect across SQL*Plus sessions until a SET FLAGGER OFF (or ALTER SESSION SET FLAGGER = OFF) command is successful or you exit SQL*Plus.
When FIPS flagging is enabled, SQL*Plus displays a warning for the CONNECT, DISCONNECT, and ALTER SESSION SET FLAGGER commands, even if they are successful.
SET FLUSH is not supported in iSQL*Plus
Controls when output is sent to the user's display device. OFF enables the operating system to buffer output. ON disables buffering. FLUSH only affects display output, it does not affect spooled output.
Use OFF only when you run a script non-interactively (that is, when you do not need to see output and/or prompts until the script finishes running). The use of FLUSH OFF may improve performance by reducing the amount of program I/O.
Controls printing of column headings in reports.
ON prints column headings in reports; OFF suppresses column headings.
The SET HEADING OFF command does not affect the column width displayed, it only suppresses the printing of the column header itself.
Example
To suppress the display of column headings in a report, enter
SET HEADING OFF
If you then run a SQL SELECT command
SELECT LAST_NAME, SALARY
FROM EMP_DETAILS_VIEW
WHERE JOB_ID = 'AC_MGR';
the following output results:
Higgins 12000 |
To turn the display of column headings back on, enter
SET HEADING ON
Defines the character used as a line break in column headings.
The heading separator character cannot be alphanumeric or white space. You can use the heading separator character in the COLUMN command and in the old forms of BTITLE and TTITLE to divide a column heading or title onto more than one line. ON or OFF turns heading separation on or off. When heading separation is OFF, SQL*Plus prints a heading separator character like any other character. ON changes the value of c back to the default "|".
The Heading Separator character (SET HEADSEP) is only supported in iSQL*Plus when the Preformatted Output preference is ON (SET MARKUP HTML PREFORMAT).
Changes the default instance for your session to the specified instance path.
Using the SET INSTANCE command does not connect to a database. The default instance is used for commands when no instance is specified. Any commands preceding the first use of SET INSTANCE communicate with the default instance.
To reset the instance to the default value for your operating system, you can either enter SET INSTANCE with no instance_path or SET INSTANCE LOCAL.
Note, you can only change the instance when you are not currently connected to any instance. That is, you must first make sure that you have disconnected from the current instance, then set or change the instance, and reconnect to an instance in order for the new setting to be enabled.
This command may only be issued when Oracle Net is running. You can use any valid Oracle Net connect identifier as the specified instance path. See your operating system-specific Oracle Database documentation for a complete description of how your operating system specifies Oracle Net connect identifiers. The maximum length of the instance path is 64 characters.
Example
To set the default instance to "PROD1" enter
DISCONNECT
SET INSTANCE PROD1
To set the instance back to the default of local, enter
SET INSTANCE local
You must disconnect from any connected instances to change the instance.
Sets the total number of characters that SQL*Plus displays on one line before beginning a new line.
It also controls the position of centered and right-aligned text in TTITLE, BTITLE, REPHEADER and REPFOOTER. Changing the linesize setting can affect text wrapping in output from the DESCRIBE command. DESCRIBE output columns are typically allocated a proportion of the linesize. Decreasing or increasing the linesize may give unexpected text wrapping in your display. You can define LINESIZE as a value from 1 to a maximum that is system dependent.
Sets the starting position from which CLOB and NCLOB data is retrieved and displayed.
Example
To set the starting position from which a CLOB column's data is retrieved to the 22nd position, enter
SET LOBOFFSET 22
The CLOB data will wrap on your screen; SQL*Plus will not truncate until the 23rd character.
Specifies the location from which archive logs are retrieved during recovery.
The default value is set by the LOG_ARCHIVE_DEST initialization parameter in the Oracle Database initialization file, init.ora. Using the SET LOGSOURCE command without a pathname restores the default location.
Example
To set the default location of log files for recovery to the directory "/usr/oracle10/dbs/arch" enter
SET LOGSOURCE "/usr/oracle10/dbs/arch"
RECOVER DATABASE
Sets maximum width (in bytes) for displaying CLOB, LONG, NCLOB and XMLType values; and for copying LONG values.
The maximum value of n is 2,000,000,000 bytes.
Example
To set the maximum number of bytes to fetch for displaying and copying LONG values, to 500, enter
SET LONG 500
The LONG data will wrap on your screen; SQL*Plus will not truncate until the 501st byte. The default for LONG is 80 bytes.
Sets the size (in bytes) of the increments SQL*Plus uses to retrieve a CLOB, LONG, NCLOB or XMLType value.
LONGCHUNKSIZE is not used for object relational queries such as CLOB, or NCLOB.
Example
To set the size of the increments in which SQL*Plus retrieves LONG values to 100 bytes, enter
SET LONGCHUNKSIZE 100
The LONG data will be retrieved in increments of 100 bytes until the entire value is retrieved or the value of SET LONG is reached, whichever is the smaller.
Outputs HTML marked up text, which is the output used by iSQL*Plus.
Beware of using options which generate invalid HTML output in iSQL*Plus as it may corrupt the browser screen. The HEAD and BODY options may be useful for dynamic reports and for reports saved to local files.
To be effective, SET MARKUP commands that change values in dynamic report output must occur before statements that produce query output. The first statement that produces query output triggers the output of information affected by SET MARKUP such as HEAD and TABLE settings. Subsequent SET MARKUP commands have no effect on the information already sent to the report.
SET MARKUP only specifies that SQL*Plus output will be HTML encoded. You must use SET MARKUP HTML ON SPOOL ON and the SQL*Plus SPOOL command to create and name a spool file, and to begin writing HMTL output to it. SET MARKUP has the same options and behavior as SQLPLUS -MARKUP.
See "MARKUP Options" for detailed information. For examples of usage, see SET MARK[UP] HTML [ON | OFF] [HEAD text] [BODY text] [TABLE text] [ENTMAP {ON | OFF}] [SPOOL {ON | OFF}] [PRE[FORMAT] {ON | OFF}], and "Generating HTML Reports from SQL*Plus".
Use the SHOW MARKUP command to view the status of MARKUP options.
Example
The following is a script which uses the SET MARKUP HTML command to enable HTML marked up text to be spooled to a specified file:
|
Note: The SET MARKUP example command is laid out for readability using line continuation characters "–" and spacing. Command options are concatenated in normal entry. |
Use your favorite text editor to enter the commands necessary to set up the HTML options and the query you want for your report.
SET MARKUP HTML ON SPOOL ON HEAD "<TITLE>SQL*Plus Report</title> -
STYLE TYPE='TEXT/CSS'><!--BODY {background: ffffc6} --></STYLE>"
SET ECHO OFF
SPOOL employee.htm
SELECT FIRST_NAME, LAST_NAME, SALARY
FROM EMP_DETAILS_VIEW
WHERE SALARY>12000;
SPOOL OFF
SET MARKUP HTML OFF
SET ECHO ON
As this script contains SQL*Plus commands, do not attempt to run it with / (slash) from the buffer because it will fail. Save the script in your text editor and use START to execute it:
START employee.sql
As well as writing the HTML spool file, employee.htm, the output is also displayed on screen because SET TERMOUT defaults to ON. You can view the spool file, employee.htm, in your web browser. It should appear something like the following:
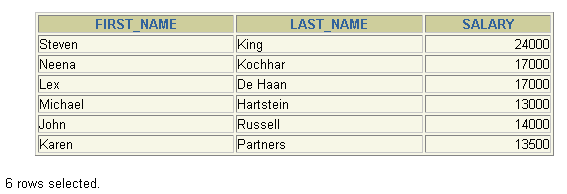
Sets the number of blank lines to be printed from the top of each page to the top title. A value of zero places a formfeed at the beginning of each page (including the first page) and clears the screen on most terminals. If you set NEWPAGE to NONE, SQL*Plus does not print a blank line or formfeed between the report pages.
Sets the text displayed whenever a null value occurs in the result of a SQL SELECT command.
Use the NULL clause of the COLUMN command to override the setting of the NULL variable for a given column. The default output for a null is blank ("").
Sets the default format for displaying numbers. Enter a number format for format. Enter
SET NUMFORMAT ""
to use the default field width and formatting model specified by SET NUMWIDTH.
Sets the default width for displaying numbers. See the FORMAT clause of the COLUMN command and SET NUMF[ORMAT] format and SET NUM[WIDTH] {10 | n}. for number format descriptions.
COLUMN FORMAT settings take precedence over SET NUMFORMAT settings, which take precedence over SET NUMWIDTH settings.
Sets the number of rows on each page of output in iSQL*Plus, and the number of lines on each page of output in command-line and Windows GUI. You can set PAGESIZE to zero to suppress all headings, page breaks, titles, the initial blank line, and other formatting information.
In iSQL*Plus, sets the number of rows displayed on each page. Error and informational messages are not counted in the page size, so pages may not always be exactly the same length. The default pagesize for iSQL*Plus is 24.
Enables you to control scrolling of your terminal when running reports. You need to first, SET PAUSE text, and then SET PAUSE ON if you want text to appear each time SQL*Plus pauses.
In command-line and Windows GUI, SET PAUSE ON pauses output at the beginning of each PAGESIZE number of lines of report output. Press Return to view more output. SET PAUSE text specifies the text to be displayed each time SQL*Plus pauses. Multiple words in text must be enclosed in single quotes.
You can embed terminal-dependent escape sequences in the PAUSE command. These sequences allow you to create inverse video messages or other effects on terminals that support such characteristics.
In iSQL*Plus, SET PAUSE ON displays the value of text, then pauses output and displays a Next Page button after PAGESIZE number of rows of report output. Click the Next Page button to view more report output. The Next Page button is not displayed on the final page of output.
RECSEP tells SQL*Plus where to make the record separation.
For example, if you set RECSEP to WRAPPED, SQL*Plus prints a record separator only after wrapped lines. If you set RECSEP to EACH, SQL*Plus prints a record separator following every row. If you set RECSEP to OFF, SQL*Plus does not print a record separator.
The Display Record Separator preference (SET RECSEP) is only supported in iSQL*Plus when Preformatted Output is On (SET MARKUP HTML PREFORMAT).
Defines the character to display or print to separate records.
A record separator consists of a single line of the RECSEPCHAR (record separating character) repeated LINESIZE times. The default is a single space.
Controls whether to display output (that is, DBMS_OUTPUT.PUT_LINE) of stored procedures or PL/SQL blocks in SQL*Plus.
OFF suppresses the output of DBMS_OUTPUT.PUT_LINE; ON displays the output.
SIZE sets the number of bytes of the output that can be buffered within the Oracle Database server. The default for n is 2000. n cannot be less than 2000 or greater than 1,000,000.
Every server output line begins on a new output line.
When WRAPPED is enabled SQL*Plus wraps the server output within the line size specified by SET LINESIZE, beginning new lines when required.
When WORD_WRAPPED is enabled, each line of server output is wrapped within the line size specified by SET LINESIZE. Lines are broken on word boundaries. SQL*Plus left justifies each line, skipping all leading whitespace.
When TRUNCATED is enabled, each line of server output is truncated to the line size specified by SET LINESIZE.
For more information on DBMS_OUTPUT.PUT_LINE, see your Oracle Database Application Developer's Guide - Fundamentals.
Example
To enable text display in a PL/SQL block using DBMS_OUTPUT.PUT_LINE, enter
SET SERVEROUTPUT ON
The following example shows what happens when you execute an anonymous procedure with SET SERVEROUTPUT ON:
BEGIN
  DBMS_OUTPUT.PUT_LINE('Task is complete');
END;
/
Task is complete. PL/SQL procedure successfully completed. |
The following example shows what happens when you create a trigger with SET SERVEROUTPUT ON:
CREATE TABLE SERVER_TAB (Letter CHAR);
CREATE TRIGGER SERVER_TRIG BEFORE INSERT OR UPDATE -
OR DELETE
ON SERVER_TAB
BEGIN
DBMS_OUTPUT.PUT_LINE('Task is complete.');
END;
/
Trigger Created. |
INSERT INTO SERVER_TAB VALUES ('M');
DROP TABLE SERVER_TAB;
/* Remove SERVER_TAB from database */
Task is complete. 1 row created. |
To set the output to WORD_WRAPPED, enter
SET SERVEROUTPUT ON FORMAT WORD_WRAPPED
SET LINESIZE 20
BEGIN
  DBMS_OUTPUT.PUT_LINE('If there is nothing left to do');
  DBMS_OUTPUT.PUT_LINE('shall we continue with plan B?');
END;
/
If there is nothing left to do shall we continue with plan B? |
To set the output to TRUNCATED, enter
SET SERVEROUTPUT ON FORMAT TRUNCATED
SET LINESIZE 20
BEGIN
  DBMS_OUTPUT.PUT_LINE('If there is nothing left to do');
  DBMS_OUTPUT.PUT_LINE('shall we continue with plan B?');
END;
/
If there is nothing shall we continue wi |
SET SHIFTINOUT is not supported in iSQL*Plus
Enables correct alignment for terminals that display shift characters. The SET SHIFTINOUT command is useful for terminals which display shift characters together with data (for example, IBM 3270 terminals). You can only use this command with shift sensitive character sets (for example, JA16DBCS).
Use VISIBLE for terminals that display shift characters as a visible character (for example, a space or a colon). INVISIBLE is the opposite and does not display any shift characters.
Example
To enable the display of shift characters on a terminal that supports them, enter
SET SHIFTINOUT VISIBLE
SELECT LAST_NAME, JOB_ID FROM EMP_DETAILS_VIEW
WHERE SALARY > 12000;
LAST_NAME JOB_ID ---------- ---------- :JJOO: :AABBCC: :AA:abc :DDEE:e |
where ":" = visible shift character
uppercase represents multibyte characters
lowercase represents singlebyte characters
SET SHOWMODE is not supported in iSQL*Plus
Controls whether SQL*Plus lists the old and new settings of a SQL*Plus system variable when you change the setting with SET. ON lists the settings; OFF suppresses the listing. SHOWMODE ON has the same behavior as the obsolete SHOWMODE BOTH.
SET SQLBLANKLINES is not supported in iSQL*Plus
Controls whether SQL*Plus puts blank lines within a SQL command or script. ON interprets blank lines and new lines as part of a SQL command or script. OFF, the default value, does not allow blank lines or new lines in a SQL command or script or script.
Enter the BLOCKTERMINATOR to stop SQL command entry without running the SQL command. Enter the SQLTERMINATOR character to stop SQL command entry and run the SQL statement.
Example
To allow blank lines in a SQL statement, enter
SET SQLBLANKLINES ON
REM Using the SQLTERMINATOR (default is ";")
REM Could have used the BLOCKTERMINATOR (default is ".")
SELECT *

FROM

DUAL

;
The following output results:
D - X |
Converts the case of SQL commands and PL/SQL blocks just prior to execution.
SQL*Plus converts all text within the command, including quoted literals and identifiers, to uppercase if SQLCASE equals UPPER, to lowercase if SQLCASE equals LOWER, and makes no changes if SQLCASE equals MIXED.
SQLCASE does not change the SQL buffer itself.
SET SQLCONTINUE is not supported in iSQL*Plus
Sets the character sequence SQL*Plus displays as a prompt after you continue a SQL*Plus command on an additional line using a hyphen (–).
Example
To set the SQL*Plus command continuation prompt to an exclamation point followed by a space, enter
SET SQLCONTINUE '! '
SQL*Plus will prompt for continuation as follows:
TTITLE 'MONTHLY INCOME' -
! RIGHT SQL.PNO SKIP 2 -
! CENTER 'PC DIVISION'
The default continuation prompt is "> ".
SET SQLNUMBER is not supported in iSQL*Plus
Sets the prompt for the second and subsequent lines of a SQL command or PL/SQL block. ON sets the prompt to be the line number. OFF sets the prompt to the value of SQLPROMPT.
Sets the behavior to that of the release or version specified by x.y[.z].
Where x is the version number, y is the release number, and z is the update number. For example, 8.1.7, 9.0.1 or 10.1. The features affected by SQLPLUSCOMPATIBILITY are tabulated in the SQL*Plus Compatibility Matrix shown. You can also set the value of SQLPLUSCOMPATIBILITY using the -C[OMPATIBILITY] argument of the SQLPLUS command when starting SQL*Plus from the command line.
The default setting for SQLPLUSCOMPATIBILITY is the value of the SQL*Plus client, which is 10.1.0.
It is recommended that you add SET SQLPLUSCOMPATIBILITY 10.1.0 to your scripts to maximize their compatibility with future versions of SQL*Plus.
The SQL*Plus Compatibility Matrix tabulates behavior affected by each SQL*Plus compatibility setting. SQL*Plus compatibility modes can be set in three ways:
You can include a SET SQLPLUSCOMPATIBILITY command in your site or user profile. On installation, there is no SET SQLPLUSCOMPATIBILITY setting in glogin.sql. Therefore the default compatibility is 10.1.
You can use the SET SQLPLUSCOMPATIBILITY {x.y[.z]} command during a session to set the SQL*Plus behavior you want for that session.
The following table shows the release of SQL*Plus which introduced the behavior change, and hence the minimum value of SQLPLUSCOMPATIBILITY to obtain that behavior. For example, to obtain the earlier behavior of the VARIABLE command, you must either use a version of SQL*Plus earlier than 9.0.1, or you must use a SQLPLUSCOMPATIBILITY value of less than 9.0.1. The lowest value that can be set for SQLPLUSCOMPATIBILITY is 7.3.4
Table 13-4 Compatibility Matrix
SET SQLPREFIX is not supported in iSQL*Plus
Sets the SQL*Plus prefix character. While you are entering a SQL command or PL/SQL block, you can enter a SQL*Plus command on a separate line, prefixed by the SQL*Plus prefix character. SQL*Plus will execute the command immediately without affecting the SQL command or PL/SQL block that you are entering. The prefix character must be a non-alphanumeric character.
SET SQLPROMPT is not supported in iSQL*Plus
Sets the SQL*Plus command prompt. SET SQLPROMPT substitute variables dynamically. This enables the inclusion of runtime variables such as the current connection identifier. Substitution variables used in SQLPROMPT do not have to be prefixed with '&', and they can be used and accessed like any other substitution variable. Variable substitution is not attempted for 'SQL' in the default prompt.
Variable substitution occurs each time SQLPROMPT is SET. If SQLPROMPT is included in glogin.sql, then substitution variables in SQLPROMPT are refreshed with each login or connect.
Example
You need the Select Any Table privilege to successfully run the following example scripts.
To change your SQL*Plus prompt to display your connection identifier, enter:
SET SQLPROMPT "_CONNECT_IDENTIFIER > "
To set the SQL*Plus command prompt to show the current user, enter
SET SQLPROMPT "_USER > "
To change your SQL*Plus prompt to display your the current date, the current user and the users privilege level, enter:
SET SQLPROMPT "_DATE _USER _PRIVILEGE> "
To change your SQL*Plus prompt to display a variable you have defined, enter:
DEFINE mycon = Prod1
SET SQLPROMPT "mycon> "
Prod1> |
Text in nested quotes is not parsed for substitution. To have a SQL*Plus prompt of your username, followed by "@", and then your connection identifier, enter:
SET SQLPROMPT "_USER'@'_CONNECT_IDENTIFIER > "
Sets the character used to end script or data entry for PL/SQL blocks or SQL statements, to execute the script and to load it into the buffer.
It cannot be an alphanumeric character or a whitespace. OFF means that SQL*Plus recognizes no command terminator; you terminate a SQL command by entering an empty line or a slash (/). If SQLBLANKLINES is set ON, you must use the BLOCKTERMINATOR to terminate a SQL command. ON resets the terminator to the default semicolon (;).
SET SUFFIX is not supported in iSQL*Plus
Sets the default file extension that SQL*Plus uses in commands that refer to scripts. SUFFIX does not control extensions for spool files.
Example
To change the default command-file extension from the default, .SQL to .TXT, enter
SET SUFFIX TXT
If you then enter
GET EXAMPLE
SQL*Plus will look for a file named EXAMPLE.TXT instead of EXAMPLE.SQL.
SET TAB is not supported in iSQL*Plus
Determines how SQL*Plus formats white space in terminal output. OFF uses spaces to format white space in the output. ON uses the TAB character. TAB settings are every eight characters. The default value for TAB is system dependent.
SET TERMOUT is not supported in iSQL*Plus
Controls the display of output generated by commands in a script that is executed with @, @@ or START. OFF suppresses the display so that you can spool output to a file without displaying the output on screen. ON displays the output on screen. TERMOUT OFF does not affect output from commands you enter interactively or redirect to SQL*Plus from the operating system.
SET TIME is not supported in iSQL*Plus
Controls the display of the current time. ON displays the current time before each command prompt. OFF suppresses the time display.
Controls the display of timing statistics.
ON displays timing statistics on each SQL command or PL/SQL block run. OFF suppresses timing of each command.
See TIMING for information on timing multiple commands.
SET TRIMOUT is not supported in iSQL*Plus
Determines whether SQL*Plus puts trailing blanks at the end of each displayed line. ON removes blanks at the end of each line, improving performance especially when you access SQL*Plus from a slow communications device. OFF enables SQL*Plus to display trailing blanks. TRIMOUT ON does not affect spooled output.
SET TRIMSPOOL is not supported in iSQL*Plus
Determines whether SQL*Plus puts trailing blanks at the end of each spooled line. ON removes blanks at the end of each line. OFF enables SQL*Plus to include trailing blanks. TRIMSPOOL ON does not affect terminal output.
Sets the character used to underline column headings in reports. The underline character cannot be an alphanumeric character or a white space. ON or OFF turns underlining on or off. ON changes the value of c back to the default "-".
SET UNDERLINE is supported in iSQL*Plus when SET MARKUP HTML PREFORMAT ON is set.
Controls whether to list the text of a SQL statement or PL/SQL command before and after replacing substitution variables with values. ON lists the text; OFF suppresses the listing.
Controls whether to truncate the display of a selected row if it is too long for the current line width. OFF truncates the selected row; ON enables the selected row to wrap to the next line.
Use the WRAPPED and TRUNCATED clauses of the COLUMN command to override the setting of WRAP for specific columns.
Syntax
SHO[W] option
where option represents one of the following terms or clauses:
system_variable
ALL
BTI[TLE]
ERR[ORS] [ { FUNCTION | PROCEDURE | PACKAGE | PACKAGE BODY | TRIGGER
| VIEW | TYPE | TYPE BODY | DIMENSION | JAVA CLASS } [schema.]name]
LNO
PARAMETERS [parameter_name]
PNO
RECYC[LEBIN] [original_name]
REL[EASE]
REPF[OOTER]
REPH[EADER]
SGA
SPOO[L] (Not available in iSQL*Plus)
SQLCODE
TTI[TLE]
USER
Shows the value of a SQL*Plus system variable or the current SQL*Plus environment. SHOW SGA requires a DBA privileged login.
Terms
system_variable
Represents any system variable set by the SET command.
ALL
Lists the settings of all SHOW options, except ERRORS and SGA, in alphabetical order.
BTI[TLE]
Shows the current BTITLE definition.
ERR[ORS] [{FUNCTION | PROCEDURE | PACKAGE | PACKAGE BODY | TRIGGER
| VIEW | TYPE | TYPE BODY | DIMENSION | JAVA CLASS} [schema.]name]
Shows the compilation errors of a stored procedure (includes stored functions, procedures, and packages). After you use the CREATE command to create a stored procedure, a message is displayed if the stored procedure has any compilation errors. To see the errors, you use SHOW ERRORS.
When you specify SHOW ERRORS with no arguments, SQL*Plus shows compilation errors for the most recently created or altered stored procedure. When you specify the type (function, procedure, package, package body, trigger, view, type, type body, dimension, or java class) and the name of the PL/SQL stored procedure, SQL*Plus shows errors for that stored procedure. For more information on compilation errors, see your PL/SQL User's Guide and Reference.
schema contains the named object. If you omit schema, SHOW ERRORS assumes the object is located in your current schema.
SHOW ERRORS output displays the line and column number of the error (LINE/COL) as well as the error itself (ERROR). LINE/COL and ERROR have default widths of 8 and 65, respectively. You can use the COLUMN command to alter the default widths.
LNO
Shows the current line number (the position in the current page of the display and/or spooled output).
PARAMETERS [parameter_name]
Displays the current values for one or more initialization parameters. You can use a string after the command to see a subset of parameters whose names include that string. For example, if you enter:
SHOW PARAMETERS COUNT
NAME TYPE VALUE ------------------------------ ----- ----- db_file_multiblock_read_count integer 12 spin_count integer 0 |
The SHOW PARAMETERS command, without any string following the command, displays all initialization parameters.
The column names and formats used in the SHOW PARAMETERS output is set in the site profile file, glogin.sql. The value column display may be truncated.
Your output may vary depending on the version and configuration of the Oracle Database server to which you are connected. You need SELECT ON V_$PARAMETER object privileges to use the PARAMETERS clause, otherwise you will receive a message
ORA-00942: table or view does not exist
PNO
Shows the current page number.
RECYC[LEBIN] [original_name]
Shows objects in the recycle bin that can be reverted with the FLASHBACK BEFORE DROP command. You do not need to remember column names, or interpret the less readable output from the query:
SELECT * FROM USER_RECYCLEBIN
The query returns four columns displayed in the following order:
| Column Name | Description |
|---|---|
ORIGINAL NAME |
Shows the original name used when creating the object. |
RECYCLEBIN NAME |
Shows the name used to identify the object in the recyclebin. |
OBJECT TYPE |
Shows the type of the object. |
DROP TIME |
Shows the time when the object was dropped. |
The output columns can be formatted with the COLUMN command. The default COLUMN formatting is in the site profile, glogin.sql.
For DBAs, the command lists their own objects as they have their own user_recyclebin view.
REL[EASE]
Shows the release number of Oracle Database that SQL*Plus is accessing.
REPF[OOTER]
Shows the current REPFOOTER definition.
REPH[EADER]
Shows the current REPHEADER definition.
SPOO[L]
Shows whether output is being spooled.
SGA
Displays information about the current instance's System Global Area. You need SELECT ON V_$SGA object privileges otherwise you will receive a message
ORA-00942: table or view does not exist
SQLCODE
Shows the value of SQL.SQLCODE (the SQL return code of the most recent operation).
TTI[TLE]
Shows the current TTITLE definition.
USER
Shows the username you are currently using to access SQL*Plus. If you connect as "/ AS SYSDBA", then the SHOW USER command displays
USER is "SYS"
Examples
To display information about the SGA, enter
SHOW SGA
Total System Global Area 7629732 bytes Fixed Size 60324 bytes Variable Size 6627328 bytes Database Buffers 409600 bytes Redo Buffers 532480 bytes |
The following example illustrates how to create a stored procedure and then show its compilation errors:
CONNECT SYSTEM/MANAGER
CREATE PROCEDURE HR.PROC1 AS
BEGIN
:P1 := 1;
END;
/
Warning: Procedure created with compilation errors. |
SHOW ERRORS PROCEDURE PROC1
NO ERRORS. |
SHOW ERRORS PROCEDURE HR.PROC1
Errors for PROCEDURE HR PROC1: LINE/COL ERROR -------------------------------------------------------- 3/3 PLS-00049: bad bind variable 'P1' |
To show whether AUTORECOVERY is enabled, enter
SHOW AUTORECOVERY
AUTORECOVERY ON |
To display the connect identifier for the default instance, enter
SHOW INSTANCE
INSTANCE "LOCAL" |
To display the location for archive logs, enter
SHOW LOGSOURCE
LOGSOURCE "/usr/oracle90/dbs/arch" |
To display objects that can be reverted with the FLASHBACK commands where CJ1 and ABC were objects dropped, enter:
SHOW RECYCLEBIN
ORIGINAL NAME RECYCLEBIN NAME OBJECT TYPE DROP TIME -------------- ------------------ ------------ -------------------- CJ1 RB$$29458$TABLE$0 TABLE 2003-01-22:14:54:07 ABC RB$$29453$TABLE$0 TABLE 2003-01-20:18:50:29 |
To restore CJ1, enter
FLASHBACK TABLE CJ1 TO BEFORE DROP;
Syntax
SHUTDOWN [ABORT | IMMEDIATE | NORMAL | TRANSACTIONAL [LOCAL]]
Shuts down a currently running Oracle Database instance, optionally closing and dismounting a database.
Terms
Proceeds with the fastest possible shutdown of the database without waiting for calls to complete or users to disconnect.
Uncommitted transactions are not rolled back. Client SQL statements currently being processed are terminated. All users currently connected to the database are implicitly disconnected and the next database startup will require instance recovery.
You must use this option if a background process terminates abnormally.
Does not wait for current calls to complete or users to disconnect from the database.
Further connects are prohibited. The database is closed and dismounted. The instance is shutdown and no instance recovery is required on the next database startup.
NORMAL is the default option which waits for users to disconnect from the database.
Further connects are prohibited. The database is closed and dismounted. The instance is shutdown and no instance recovery is required on the next database startup.
Performs a planned shutdown of an instance while allowing active transactions to complete first. It prevents clients from losing work without requiring all users to log off.
No client can start a new transaction on this instance. Attempting to start a new transaction results in disconnection. After completion of all transactions, any client still connected to the instance is disconnected. Now the instance shuts down just as it would if a SHUTDOWN IMMEDIATE statement was submitted. The next startup of the database will not require any instance recovery procedures.
The LOCAL mode specifies a transactional shutdown on the local instance only, so that it only waits on local transactions to complete, not all transactions. This is useful, for example, for scheduled outage maintenance.
Usage
SHUTDOWN with no arguments is equivalent to SHUTDOWN NORMAL.
You must be connected to a database as SYSOPER, or SYSDBA. You cannot connect through a multi-threaded server. See CONNECT for more information about connecting to a database.
Examples
To shutdown the database in normal mode, enter
SHUTDOWN
Database closed. Database dismounted. Oracle instance shut down. |
SPOOL is not available in iSQL*Plus.
Syntax
SPO[OL] [file_name[.ext] [CRE[ATE] | REP[LACE] | APP[END]] | OFF | OUT]
Stores query results in a file, or optionally sends the file to a printer. In iSQL*Plus, use the preference settings to direct output to a file.
Terms
file_name[.ext]
Represents the name of the file to which you wish to spool. SPOOL followed by file_name begins spooling displayed output to the named file. If you do not specify an extension, SPOOL uses a default extension (LST or LIS on most systems).
CRE[ATE]
Creates a new file with the name specified.
REP[LACE]
Replaces the contents of an existing file. If the file does not exist, REPLACE creates the file. This is the default behavior.
APP[END]
Adds the contents of the buffer to the end of the file you specify.
OFF
OUT
Stops spooling and sends the file to your computer's standard (default) printer. This option is not available on some operating systems.
Enter SPOOL with no clauses to list the current spooling status.
Usage
To spool output generated by commands in a script without displaying the output on the screen, use SET TERMOUT OFF. SET TERMOUT OFF does not affect output from commands that run interactively.
You must use quotes around file names containing white space.
To create a valid HTML file using SPOOL APPEND commands, you must use PROMPT or a similar command to create the HTML page header and footer. The SPOOL APPEND command does not parse HTML tags.
Use SET SQLPLUSCOMPAT[IBILITY] 9.2 or earlier to use the earlier behavior. However, this will also disable other functionality that is available in SQL*Plus Release 10.1. See "SQL*Plus Compatibility Matrix" to determine what functionality is controlled by the SET SQLPLUSCOMPAT[IBILITY] command.
Examples of SPOOL Command
To record your output in the new file DIARY using the default file extension, enter
SPOOL DIARY CREATE
To append your output to the existing file DIARY, enter
SPOOL DIARY APPEND
To record your output to the file DIARY, overwriting the existing content, enter
SPOOL DIARY REPLACE
To stop spooling and print the file on your default printer, enter
SPOOL OUT
Syntax
STA[RT] {url | file_name[.ext] } [arg...]
Runs the SQL*Plus statements in the specified script. The script can be called from the local file system or from a web server. Only the url form is supported in iSQL*Plus. You can pass values to script variables in the usual way.
Terms
url
Specifies the Uniform Resource Locator of a script to run on the specified web server. SQL*Plus supports HTTP and FTP protocols, but not HTTPS. HTTP authentication in the form http://username:password@machine_name.domain... is not supported in this release.
file_name[.ext]
The script you wish to execute. The file can contain any command that you can run interactively.
If you do not specify an extension, SQL*Plus assumes the default command-file extension (normally SQL). See SET SUF[FIX] {SQL | text} for information on changing the default extension.
When you enter START file_name.ext, SQL*Plus searches for a file with the filename and extension you specify in the current default directory. If SQL*Plus does not find such a file, SQL*Plus will search a system-dependent path to find the file. Some operating systems may not support the path search. See the platform-specific Oracle documentation provided for your operating system for specific information related to your operating system environment.
arg ...
Data items you wish to pass to parameters in the script. If you enter one or more arguments, SQL*Plus substitutes the values into the parameters (&1, &2, and so forth) in the script. The first argument replaces each occurrence of &1, the second replaces each occurrence of &2, and so on.
The START command defines the parameters with the values of the arguments; if you START the script again in this session, you can enter new arguments or omit the arguments to use the old values.
See "Defining Substitution Variables" and "Substitution Variables in iSQL*Plus" for more information on using parameters.
Usage
All previous settings like COLUMN command settings stay in effect when the script starts. If the script changes any setting, then this new value stays in effect after the script has finished
The @ ("at" sign) and @@ (double "at" sign) commands function similarly to START. Disabling the START command in the Product User Profile also disables the @ and @@ commands. See @ ("at" sign) and @@ (double "at" sign) for further information on these commands. See "Disabling SQL*Plus, SQL, and PL/SQL Commands" for more information.
The EXIT or QUIT command in a script terminates SQL*Plus.
Examples
A file named PROMOTE with the extension SQL, used to promote employees, might contain the following command:
SELECT FIRST_NAME, LAST_NAME, JOB_ID, SALARYFROM EMP_DETAILS_VIEWWHERE JOB_ID='&1' AND SALARY>&2;
To run this script, enter
START PROMOTE ST_MAN 7000
or if it is located on a web server, enter a command in the form:
START HTTP://machine_name.domain:port/PROMOTE.SQL ST_MAN 7000
Where machine_name.domain must be replaced by the host.domain name, and port by the port number used by the web server where the script is located.
The following command is executed:
SELECT LAST_NAME, LAST_NAME
FROM EMP_DETAILS_VIEW
WHERE JOB_ID='ST_MAN' AND SALARY>7000;
and the results displayed.
Syntax
STARTUP options | upgrade_options
where options has the following syntax:
[FORCE] [RESTRICT] [PFILE=filename] [QUIET] [ MOUNT [dbname] |
[ OPEN [open_options] [dbname] ] | NOMOUNT ]
where open_options has the following syntax:
READ {ONLY | WRITE [RECOVER]} | RECOVER
and where upgrade_options has the following syntax:
[PFILE=filename] {UPGRADE | DOWNGRADE} [QUIET]
Starts an Oracle Database instance with several options, including mounting and opening a database.
Terms
Shuts down the current Oracle Database instance (if it is running) with SHUTDOWN mode ABORT, before restarting it. If the current instance is running and FORCE is not specified, an error results. FORCE is useful while debugging and under abnormal circumstances. It should not normally be used.
Only enables Oracle Database users with the RESTRICTED SESSION system privilege to connect to the database. Later, you can use the ALTER SYSTEM command to disable the restricted session feature.
Causes the specified parameter file to be used while starting up the instance. If PFILE is not specified, then the default STARTUP parameter file is used. The default file used is platform specific. For example, the default file is $ORACLE_HOME/dbs/init$ORACLE_SID.ora on UNIX, and %ORACLE_HOME%\database\initORCL.ora on Windows.
QUIET
Suppresses the display of System Global Area information for the starting instance.
Mounts a database but does not open it.
dbname is the name of the database to mount or open. If no database name is specified, the database name is taken from the initialization parameter DB_NAME.
Mounts and opens the specified database.
Causes the database not to be mounted upon instance startup.
Cannot be used with MOUNT, or OPEN.
Specifies that media recovery should be performed, if necessary, before starting the instance. STARTUP RECOVER has the same effect as issuing the RECOVER DATABASE command and starting an instance. Only complete recovery is possible with the RECOVER option.
Recovery proceeds, if necessary, as if AUTORECOVERY is set to ON, regardless of whether or not AUTORECOVERY is enabled. If a redo log file is not found in the expected location, recovery continues as if AUTORECOVERY is disabled, by prompting you with the suggested location and name of the subsequent log files that need to be applied.
UPGRADE
Starts the database in OPEN UPGRADE mode and sets system initialization parameters to specific values required to enable database upgrade scripts to be run. UPGRADE should only be used when a database is first started with a new version of the Oracle Database Server.
See the Oracle Database Upgrade Guide for details about preparing for, testing and implementing a database version upgrade.
When run, upgrade scripts transform an installed version or release of an Oracle database into a later version, for example, to upgrade an Oracle9i database to Oracle Database 10g. Once the upgrade completes, the database should be shut down and restarted normally.
DOWNGRADE
Starts the database in OPEN DOWNGRADE mode and sets system initialization parameters to specific values required to enable database downgrade scripts to be run.
See the Oracle Database Upgrade Guide for details about preparing for, testing and implementing a database version downgrade.
When run, downgrade scripts transform an installed version or release of Oracle Database into a previous version, for example, to downgrade an Oracle10g database to an Oracle9i database. Once the downgrade completes, the database should be shut down and restarted normally.
Usage
You must be connected to a database as SYSOPER, or SYSDBA. You cannot be connected through a multi-threaded server.
STARTUP with no arguments is equivalent to STARTUP OPEN.
STARTUP OPEN RECOVER mounts and opens the database even when recovery fails.
Examples
To start an instance using the standard parameter file, mount the default database, and open the database, enter
STARTUP
or enter
STARTUP OPEN database
To start an instance using the standard parameter file, mount the default database, and open the database, enter
STARTUP FORCE RESTRICT MOUNT
To start an instance using the parameter file TESTPARM without mounting the database, enter
STARTUP PFILE=testparm NOMOUNT
To shutdown a particular database, immediately restart and open it, allow access only to users with the RESTRICTED SESSION privilege, and use the parameter file MYINIT.ORA. enter
STARTUP FORCE RESTRICT PFILE=myinit.ora OPEN database
To startup an instance and mount but not open a database, enter
CONNECT / as SYSDBA
Connected to an idle instance. |
STARTUP MOUNT
ORACLE instance started. Total System Global Area 7629732 bytes Fixed Size 60324 bytes Variable Size 6627328 bytes Database Buffers 409600 bytes Redo Buffers 532480 bytes |
STORE is not available in iSQL*Plus.
Syntax
STORE SET file_name[.ext] [ CRE[ATE | REP[LACE] | APP[END]]
Saves attributes of the current SQL*Plus environment in a script.
Terms
See SAVE for information on the other terms and clauses in the STORE command syntax.
SET
Saves the values of the system variables.
Usage
This command creates a script which can be executed with the START, @ ("at" sign) or @@ (double "at" sign) commands.
If you want to store a file under a name identical to a STORE command clause (that is, CREATE, REPLACE or APPEND), you must put the name in single quotes or specify a file extension.
Examples
To store the current SQL*Plus system variables in a file named DEFAULTENV with the default command-file extension, enter
STORE SET DEFAULTENV
To append the current SQL*Plus system variables to an existing file called DEFAULTENV with the extension OLD, enter
STORE SET DEFAULTENV.OLD APPEND
Syntax
TIMI[NG] [START text | SHOW | STOP]
Records timing data for an elapsed period of time, lists the current timer's name and timing data, or lists the number of active timers.
Terms
START text
Sets up a timer and makes text the name of the timer. You can have more than one active timer by STARTing additional timers before STOPping the first; SQL*Plus nests each new timer within the preceding one. The timer most recently STARTed becomes the current timer.
SHOW
Lists the current timer's name and timing data.
STOP
Lists the current timer's name and timing data, then deletes the timer. If any other timers are active, the next most recently STARTed timer becomes the current timer.
Enter TIMING with no clauses to list the number of active timers. For other information about TIMING, see SET AUTOTRACE
Usage
You can use this data to do a performance analysis on any commands or blocks run during the period.
Refer to the SET TIMING command for information on automatically displaying timing data after each SQL command or PL/SQL block you run.
To delete all timers, use the CLEAR TIMING command.
Examples
To create a timer named SQL_TIMER, enter
TIMING START SQL_TIMER
To list the current timer's title and accumulated time, enter
TIMING SHOW
To list the current timer's title and accumulated time and to remove the timer, enter
TIMING STOP
Syntax
TTI[TLE] [printspec [text | variable] ...] [ON | OFF]
where printspec represents one or more of the following clauses used to place and format the text:
BOLD
CE[NTER]
COL n
FORMAT text
LE[FT]
R[IGHT]
S[KIP] [n]
TAB n
Places and formats a specified title at the top of each report page. Enter TTITLE with no clauses to list its current definition. The old form of TTITLE is used if only a single word or string in quotes follows the TTITLE command.
See TTI[TLE] text (obsolete old form) for a description of the old form of TTITLE.
Terms
These terms and clauses also apply to the BTITLE command.
text
The title text. Enter text in single quotes if you want to place more than one word on a single line.
variable
A substitution variable or any of the following system-maintained values, SQL.LNO (the current line number), SQL.PNO (the current page number), SQL.RELEASE (the current Oracle Database release number), SQL.SQLCODE (the current error code), or SQL.USER (the current username).
To print one of these values, reference the appropriate variable in the title. You can format variable with the FORMAT clause.
SQL*Plus substitution variables (& variables) are expanded before TTITLE is executed. The resulting string is stored as the TTITLE text. During subsequent execution for each page of results, the expanded value of a variable may itself be interpreted as a substitution variable with unexpected results.
You can avoid this double substitution in a TTITLE command by not using the & prefix for variables that are to be substituted on each page of results. If you want to use a substitution variable to insert unchanging text in a TTITLE, enclose it in quotes so that it is only substituted once.
OFF
Turns the title off (suppresses its display) without affecting its definition.
ON
Turns the title on (restores its display). When you define a top title, SQL*Plus automatically sets TTITLE to ON.
COL n
Indents to column n of the current line (backward if column n has been passed). Here "column" means print position, not table column.
S[KIP] [n]
Skips to the start of a new line n times; if you omit n, one time; if you enter zero for n, backward to the start of the current line.
TAB n
Skips forward n columns (backward if you enter a negative value for n). "Column" in this context means print position, not table column.
LE[FT] | CE[NTER] | R[IGHT]
Left-align, center, and right-align data on the current line respectively. SQL*Plus aligns following data items as a group, up to the end of the printspec or the next LEFT, CENTER, RIGHT, or COL command. CENTER and RIGHT use the SET LINESIZE value to calculate the position of the data item that follows.
BOLD
Prints data in bold print. SQL*Plus represents bold print on your terminal by repeating the data on three consecutive lines. On some operating systems, SQL*Plus may instruct your printer to print bold text on three consecutive lines, instead of bold.
FORMAT text
Specifies a format model that determines the format of following data items, up to the next FORMAT clause or the end of the command. The format model must be a text constant such as A10 or $999. See the COLUMN command for more information on formatting and valid format models.
If the datatype of the format model does not match the datatype of a given data item, the FORMAT clause has no effect on that item.
If no appropriate FORMAT model precedes a given data item, SQL*Plus prints NUMBER values using the format specified by SET NUMFORMAT or, if you have not used SET NUMFORMAT, the default format. SQL*Plus prints DATE values according to the default format.
Enter TTITLE with no clauses to list the current TTITLE definition.
Usage
If you do not enter a printspec clause before the first occurrence of text, TTITLE left justifies the text. SQL*Plus interprets TTITLE in the new form if a valid printspec clause (LEFT, SKIP, COL, and so on) immediately follows the command name.
See COLUMN for information on printing column and DATE values in the top title.
You can use any number of constants and variables in a printspec. SQL*Plus displays them in the order you specify them, positioning and formatting each constant or variable as specified by the printspec clauses that precede it.
The length of the title you specify with TTITLE cannot exceed 2400 characters.
The continuation character (a hyphen) will not be recognized inside a single-quoted title text string. To be recognized, the continuation character must appear outside the quotes, as follows:
TTITLE CENTER 'Summary Report for' -
> 'the Month of May'
Examples
To define "Monthly Analysis" as the top title and to left-align it, to center the date, to right-align the page number with a three-digit format, and to display "Data in Thousands" in the center of the next line, enter
TTITLE LEFT 'Monthly Analysis' CENTER '01 Jan 2003' -
RIGHT 'Page:' FORMAT 999 SQL.PNO SKIP CENTER -
'Data in Thousands'
Monthly Analysis                01 Jan 2003                      Page: 1
                              Data in Thousands
|
To suppress the top title display without changing its definition, enter
TTITLE OFF
Syntax
UNDEF[INE] variable ...
where variable represents the name of the substitution variable you want to delete.
Deletes one or more substitution variables that you defined either explicitly (with the DEFINE command) or implicitly (with an argument to the START command).
Examples
To undefine a substitution variable named POS, enter
UNDEFINE POS
To undefine two substitution variables named MYVAR1 and MYVAR2, enter
UNDEFINE MYVAR1 MYVAR2
Syntax
VAR[IABLE] [variable [NUMBER | CHAR | CHAR (n [CHAR | BYTE]) | NCHAR | NCHAR (n)
| VARCHAR2 (n [CHAR | BYTE]) | NVARCHAR2 (n) | CLOB | NCLOB | REFCURSOR
| BINARY_FLOAT | BINARY_DOUBLE] ]
Declares a bind variable that can be referenced in PL/SQL.
VARIABLE without arguments displays a list of all the variables declared in the session. VARIABLE followed only by a variable name lists that variable.
See "Using Bind Variables" for more information on bind variables. See your PL/SQL User's Guide and Reference for more information about PL/SQL.
Terms
variable
Represents the name of the bind variable you wish to create.
NUMBER
Creates a variable of type NUMBER with fixed length.
CHAR
Creates a variable of type CHAR (character) with length one.
CHAR (n[CHAR | BYTE])
Creates a variable of type CHAR with length n bytes or n characters. The maximum that n can be is 2000 bytes, and the minimum is 1 byte or 1 character. The maximum n for a CHAR variable with character semantics is determined by the number of bytes required to store each character for the chosen character set, with an upper limit of 2000 bytes. The length semantics are determined by the length qualifiers CHAR or BYTE, and if not explicitly stated, the value of the NLS_LENGTH_SEMANTICS environment variable is applied to the bind variable. Explicitly stating the length semantics at variable definition stage will always take precedence over the NLS_LENGTH_SEMANTICS setting.
NCHAR
Creates a variable of type NCHAR (national character) with length one.
NCHAR (n)
Creates a variable of type NCHAR with length n characters. The maximum that n can be is determined by the number of bytes required to store each character for the chosen national character set, with an upper limit of 2000 bytes. The only exception to this is when a SQL*Plus session is connected to a pre Oracle9i server, or the SQLPLUSCOMPATIBILITY system variable is set to a version less than 9.0.0. In this case the length n can be in bytes or characters depending on the chosen national character set, with the upper limit of 2000 bytes still retained.
VARCHAR2 (n[CHAR | BYTE])
Creates a variable of type VARCHAR2 with length of up to n bytes or n characters. The maximum that n can be is 4000 bytes, and the minimum is 1 byte or 1 character. The maximum n for a VARCHAR2 variable with character semantics is determined by the number of bytes required to store each character for the chosen character set, with an upper limit of 4000 bytes. The length semantics are determined by the length qualifiers CHAR or BYTE, and if not explicitly stated, the value of the NLS_LENGTH_SEMANTICS environment variable is applied to the bind variable. Explicitly stating the length semantics at variable definition stage will always take precedence over the NLS_LENGTH_SEMANTICS setting.
NVARCHAR2 (n)
Creates a variable of type NVARCHAR2 with length of up to n characters. The maximum that n can be is determined by the number of bytes required to store each character for the chosen national character set, with an upper limit of 4000 bytes. The only exception to this is when a SQL*Plus session is connected to a pre Oracle9i server, or the SQLPLUSCOMPATIBILITY system variable is set to a version less than 9.0.0. In this case the length n can be in bytes or characters depending on the chosen national character set, with the upper limit of 4000 bytes still retained.
CLOB
Creates a variable of type CLOB.
NCLOB
Creates a variable of type NCLOB.
REFCURSOR
Creates a variable of type REF CURSOR.
BINARY_FLOAT
Creates a variable of type BINARY_FLOAT.
BINARY_DOUBLE
Creates a variable of type BINARY_DOUBLE.
Usage
Bind variables may be used as parameters to stored procedures, or may be directly referenced in anonymous PL/SQL blocks.
To display the value of a bind variable created with VARIABLE, use the PRINT command. See PRINT for more information.
To automatically display the value of a bind variable created with VARIABLE, use the SET AUTOPRINT command. See "SET AUTOP[RINT] {ON | OFF}" for more information.
Bind variables cannot be used in the COPY command or SQL statements, except in PL/SQL blocks. Instead, use substitution variables.
When you execute a VARIABLE ... CLOB or NCLOB command, SQL*Plus associates a LOB locator with the bind variable. The LOB locator is automatically populated when you execute a SELECT clob_column INTO :cv statement in a PL/SQL block. SQL*Plus closes the LOB locator when you exit SQL*Plus.
To free resources used by CLOB and NCLOB bind variables, you may need to manually free temporary LOBs with:
EXECUTE DBMS_LOB.FREETEMPORARY(:cv)
All temporary LOBs are freed when you exit SQL*Plus.
SQL*Plus SET commands such as SET LONG and SET LONGCHUNKSIZE and SET LOBOFFSET may be used to control the size of the buffer while PRINTing CLOB or NCLOB bind variables.
SQL*Plus REFCURSOR bind variables may be used to reference PL/SQL 2.3 or higher Cursor Variables, allowing PL/SQL output to be formatted by SQL*Plus. For more information on PL/SQL Cursor Variables, see your PL/SQL User's Guide and Reference.
When you execute a VARIABLE ... REFCURSOR command, SQL*Plus creates a cursor bind variable. The cursor is automatically opened by an OPEN ... FOR SELECT statement referencing the bind variable in a PL/SQL block. SQL*Plus closes the cursor after completing a PRINT statement for that bind variable, or on exit.
SQL*Plus formatting commands such as BREAK, COLUMN, COMPUTE and SET may be used to format the output from PRINTing a REFCURSOR.
A REFCURSOR bind variable may not be PRINTed more than once without re-executing the PL/SQL OPEN ... FOR statement.
Examples
The following example illustrates creating a bind variable, changing its value, and displaying its current value.
To create a bind variable, enter:
VARIABLE ret_val NUMBER
To change this bind variable in SQL*Plus, you must use a PL/SQL block:
BEGIN
 :ret_val:=4;
END;
/
PL/SQL procedure successfully completed. |
To display the value of the bind variable in SQL*Plus, enter:
PRINT ret_val
RET_VAL
----------
         4
|
The following example illustrates creating a bind variable and then setting it to the value returned by a function:
VARIABLE id NUMBER
BEGIN
  :id := EMP_MANAGEMENT.HIRE
  ('BLAKE','MANAGER','KING',2990,'SALES');
END;
/
The value returned by the stored procedure is being placed in the bind variable, :id. It can be displayed with the PRINT command or used in subsequent PL/SQL subprograms.
The following example illustrates automatically displaying a bind variable:
SET AUTOPRINT ON
VARIABLE a REFCURSOR
BEGIN
  OPEN :a FOR SELECT LAST_NAME, CITY, DEPARTMENT_ID
  FROM EMP_DETAILS_VIEW
  WHERE SALARY > 12000
  ORDER BY DEPARTMENT_ID;
END;
/
PL/SQL procedure successfully completed. LAST_NAME CITY DEPARTMENT_ID ------------------------- ------------------------------ ------------- Hartstein Toronto 20 Russell Oxford 80 Partners Oxford 80 King Seattle 90 Kochhar Seattle 90 De Haan Seattle 90 6 rows selected. |
In the above example, there is no need to issue a PRINT command to display the variable.
The following example creates some variables:
VARIABLE id NUMBER
VARIABLE txt CHAR (20)
VARIABLE myvar REFCURSOR
Enter VARIABLE with no arguments to list the defined variables:
VARIABLE
variable id datatype NUMBER variable txt datatype CHAR(20) variable myvar datatype REFCURSOR |
The following example lists a single variable:
VARIABLE txt
variable txt datatype CHAR(20) |
The following example illustrates producing a report listing individual salaries and computing the departmental salary cost for employees who earn more than $12,000 per month:
VARIABLE rc REFCURSOR
BEGIN
  OPEN :rc FOR SELECT DEPARTMENT_NAME, LAST_NAME, SALARY
  FROM EMP_DETAILS_VIEW
  WHERE SALARY > 12000
  ORDER BY DEPARTMENT_NAME, LAST_NAME;
END;
/
PL/SQL procedure successfully completed. |
SET PAGESIZE 100 FEEDBACK OFF
TTITLE LEFT '*** Departmental Salary Bill ***' SKIP 2
COLUMN SALARY FORMAT $999,990.99 HEADING 'Salary'
COLUMN DEPARTMENT_NAME HEADING 'Department'
COLUMN LAST_NAME HEADING 'Employee'
COMPUTE SUM LABEL 'Subtotal:' OF SALARY ON DEPARTMENT_NAME
COMPUTE SUM LABEL 'Total:' OF SALARY ON REPORT
BREAK ON DEPARTMENT_NAME SKIP 1 ON REPORT SKIP 1
PRINT rc
*** Departmental Salary Bill ***

DEPARTMENT_NAME                Employee                  Salary
------------------------------ ------------------------- ------------
Executive                      De Haan                     $17,000.00
                               King                        $24,000.00
                               Kochhar                     $17,000.00
******************************                           ------------
Subtotal:                                                  $58,000.00

Marketing                      Hartstein                   $13,000.00
******************************                           ------------
Subtotal:                                                  $13,000.00

Sales                          Partners                    $13,500.00
                               Russell                     $14,000.00
******************************                           ------------
Subtotal:                                                  $27,500.00

                                                         ------------
Total:                                                     $98,500.00
|
The following example illustrates producing a report containing a CLOB column, and then displaying it with the SET LOBOFFSET command.
Assume you have already created a table named clob_tab which contains a column named clob_col of type CLOB. The clob_col contains the following data:
Remember to run the Departmental Salary Bill report each month. This report
contains confidential information.
To produce a report listing the data in the col_clob column, enter
VARIABLE T CLOB
BEGIN
  SELECT CLOB_COL INTO :T FROM CLOB_TAB;
END;
/
PL/SQL PROCEDURE SUCCESSFULLY COMPLETED |
To print 200 characters from the column clob_col, enter
SET LINESIZE 70
SET LONG 200
PRINT T
T ---------------------------------------------------------------------- Remember to run the Departmental Salary Bill report each month This r eport contains confidential information. |
To set the printing position to the 21st character, enter
SET LOBOFFSET 21
PRINT T
T ---------------------------------------------------------------------- Departmental Salary Bill report each month This report contains confi dential information. |
For more information on creating CLOB columns, see your Oracle Database SQL Reference
Syntax
WHENEVER OSERROR {EXIT [SUCCESS | FAILURE | n | variable | :BindVariable]
[COMMIT | ROLLBACK] | CONTINUE [COMMIT | ROLLBACK | NONE]}
Performs the specified action (exits SQL*Plus by default) if an operating system error occurs (such as a file writing error).
In iSQL*Plus, performs the specified action (stops the current script by default) and returns focus to the Workspace if an operating system error occurs.
Terms
[SUCCESS | FAILURE | n | variable | :BindVariable]
Directs SQL*Plus to perform the specified action as soon as an operating system error is detected. You can also specify that SQL*Plus return a success or failure code, the operating system failure code, or a number or variable of your choice.
EXIT [SUCCESS | FAILURE | n | variable | :BindVariable]
Directs SQL*Plus to exit as soon as an operating system error is detected. You can also specify that SQL*Plus return a success or failure code, the operating system failure code, or a number or variable of your choice. See EXIT for more information.
CONTINUE
COMMIT
Directs SQL*Plus to execute a COMMIT before exiting or continuing and save pending changes to the database.
ROLLBACK
Directs SQL*Plus to execute a ROLLBACK before exiting or continuing and abandon pending changes to the database.
NONE
Directs SQL*Plus to take no action before continuing.
Usage
If you do not enter the WHENEVER OSERROR command, the default behavior of SQL*Plus is to continue and take no action when an operating system error occurs.
If you do not enter the WHENEVER SQLERROR command, the default behavior of SQL*Plus is to continue and take no action when a SQL error occurs.
Examples
The commands in the following script cause iSQL*Plus to stop processing the current script and return focus to the Input area on the Workspace:
cause SQL*Plus to exit and COMMIT any pending changes if a failure occurs when reading from the output file:
WHENEVER OSERROR EXIT
START no_such_file
OS Message: No such file or directory Disconnected from Oracle...... |
Syntax
WHENEVER SQLERROR {EXIT [SUCCESS | FAILURE | WARNING | n | variable | :BindVariable] [COMMIT | ROLLBACK] | CONTINUE [COMMIT | ROLLBACK | NONE]}
Performs the specified action (exits SQL*Plus by default) if a SQL command or PL/SQL block generates an error.
In iSQL*Plus, performs the specified action (stops the current script by default) and returns focus to the Workspace if a SQL command or PL/SQL block generates an error.
Terms
[SUCCESS | FAILURE | WARNING | n | variable | :BindVariable]
Directs SQL*Plus to perform the specified action as soon as it detects a SQL command or PL/SQL block error (but after printing the error message). SQL*Plus will not exit on a SQL*Plus error.
EXIT [SUCCESS | FAILURE | WARNING | n | variable | :BindVariable]
Directs SQL*Plus to exit as soon as it detects a SQL command or PL/SQL block error (but after printing the error message). SQL*Plus will not exit on a SQL*Plus error. The EXIT clause of WHENEVER SQLERROR follows the same syntax as the EXIT command. See EXIT for more information.
CONTINUE
COMMIT
Directs SQL*Plus to execute a COMMIT before exiting or continuing and save pending changes to the database.
ROLLBACK
Directs SQL*Plus to execute a ROLLBACK before exiting or continuing and abandon pending changes to the database.
NONE
Directs SQL*Plus to take no action before continuing.
Usage
The WHENEVER SQLERROR command is triggered by SQL command or PL/SQL block errors, and not by SQL*Plus command errors.
Examples
The commands in the following script cause iSQL*Plus to stop processing the current script and return focus to the Input area on the Workspace:
The commands in the following script cause SQL*Plus to exit and return the SQL error code if the SQL UPDATE command fails:
WHENEVER SQLERROR EXIT SQL.SQLCODE
UPDATE EMP_DETAILS_VIEW SET SALARY = SALARY*1.1;
The following SQL command error causes iSQL*Plus to stop processing the current script and return focus to the Input area on the Workspace:
WHENEVER SQLERROR EXIT SQL.SQLCODE
select column_does_not_exiSt from dual;
select column_does_not_exist from dual
       *
ERROR at line 1:
ORA-00904: invalid column name

Disconnected from Oracle.....
|
The following examples show that the WHENEVER SQLERROR command is not executed after errors with SQL*Plus commands, but it is executed if SQL commands or PL/SQL blocks cause errors:
WHENEVER SQLERROR EXIT SQL.SQLCODE
column LAST_name headIing "Employee Name"
Unknown COLUMN option "headiing" SHOW non_existed_option |
The following PL/SQL block error causes SQL*Plus to exit and return the SQL error code:
WHENEVER SQLERROR EXIT SQL.SQLCODE
begin
  SELECT COLUMN_DOES_NOT_EXIST FROM DUAL;
END;
/
SELECT COLUMN_DOES_NOT_EXIST FROM DUAL;
       *
ERROR at line 2:
ORA-06550: line 2, column 10:
PLS-00201: identifier 'COLUMN_DOES_NOT_EXIST' must be declared
ORA-06550: line 2, column 3:
PL/SQL: SQL Statement ignored

Disconnected from Oracle.....
|
|
 Copyright © 1996, 2003 Oracle Corporation All Rights Reserved. |
|

